MARC Super Safety Installation Guide
Theory of Operation
The Hoffman Super Safety is a type of forced reset trigger. As the firearm cycles, the bolt carrier on the back stroke forces the selector into the safe position, forcing the trigger back in the process. On the forward stroke, the bolt carrier takes the selector off safe and allows the operator to pull the trigger again. This is accomplished by a rotation of the safety. The safety has 3 modes (safe, semi, and forced reset) which are selected by moving the safety side to side similar to a cross bolt safety on a shotgun.
Refer to Tim Hoffman’s Documentation for more information.
Overview of components
Different kits include different components. More detail in this chapter forthcoming.
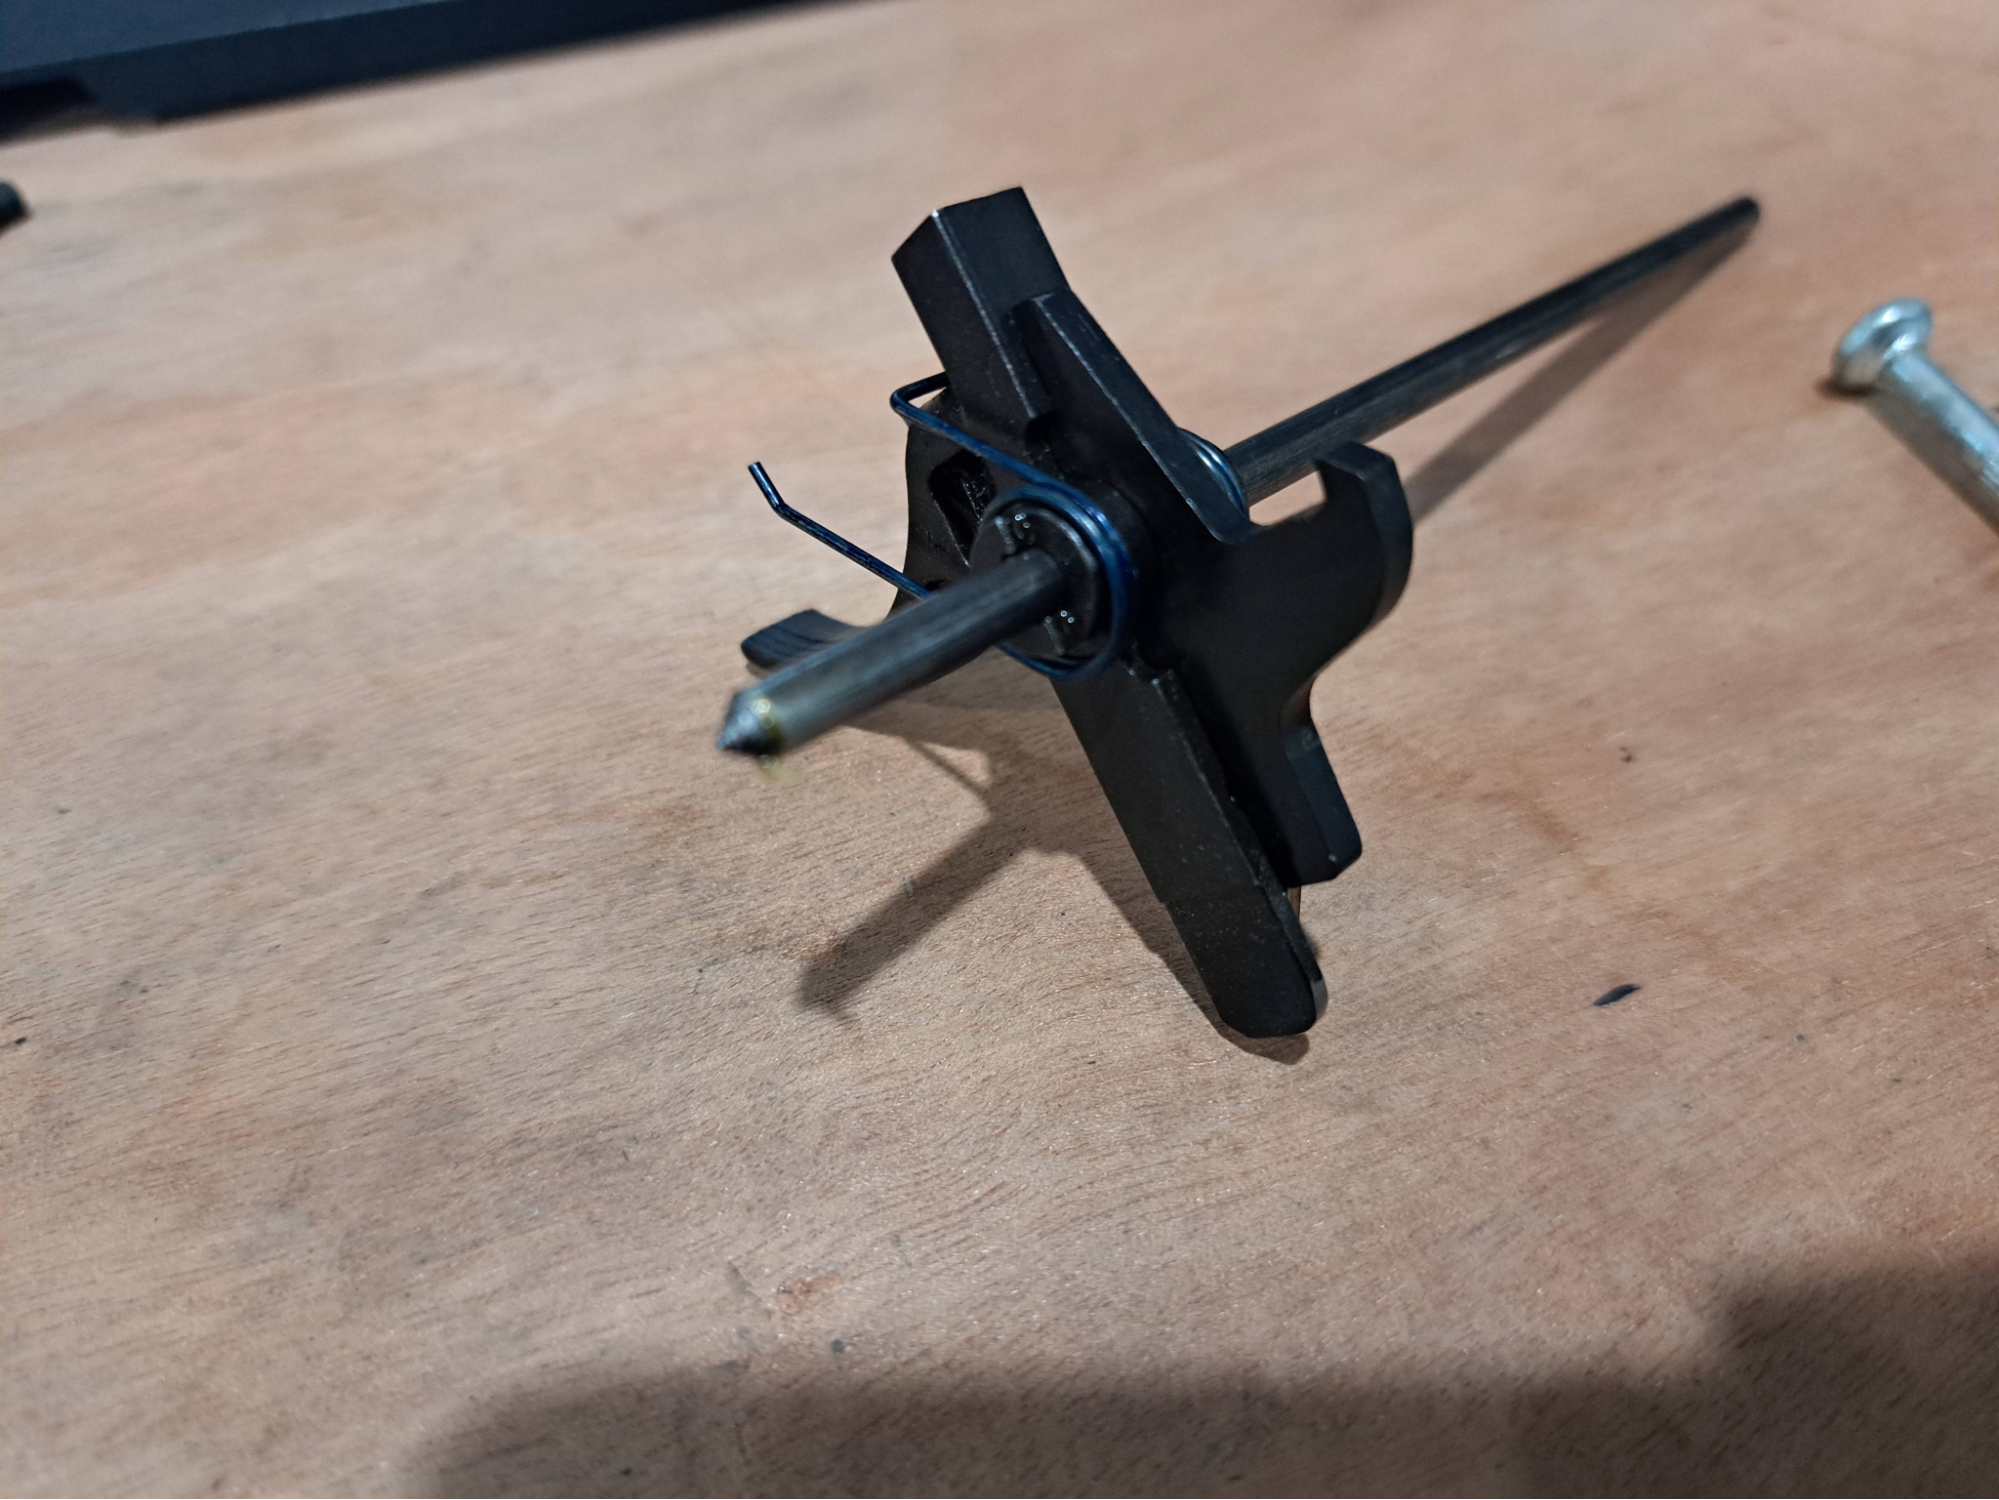
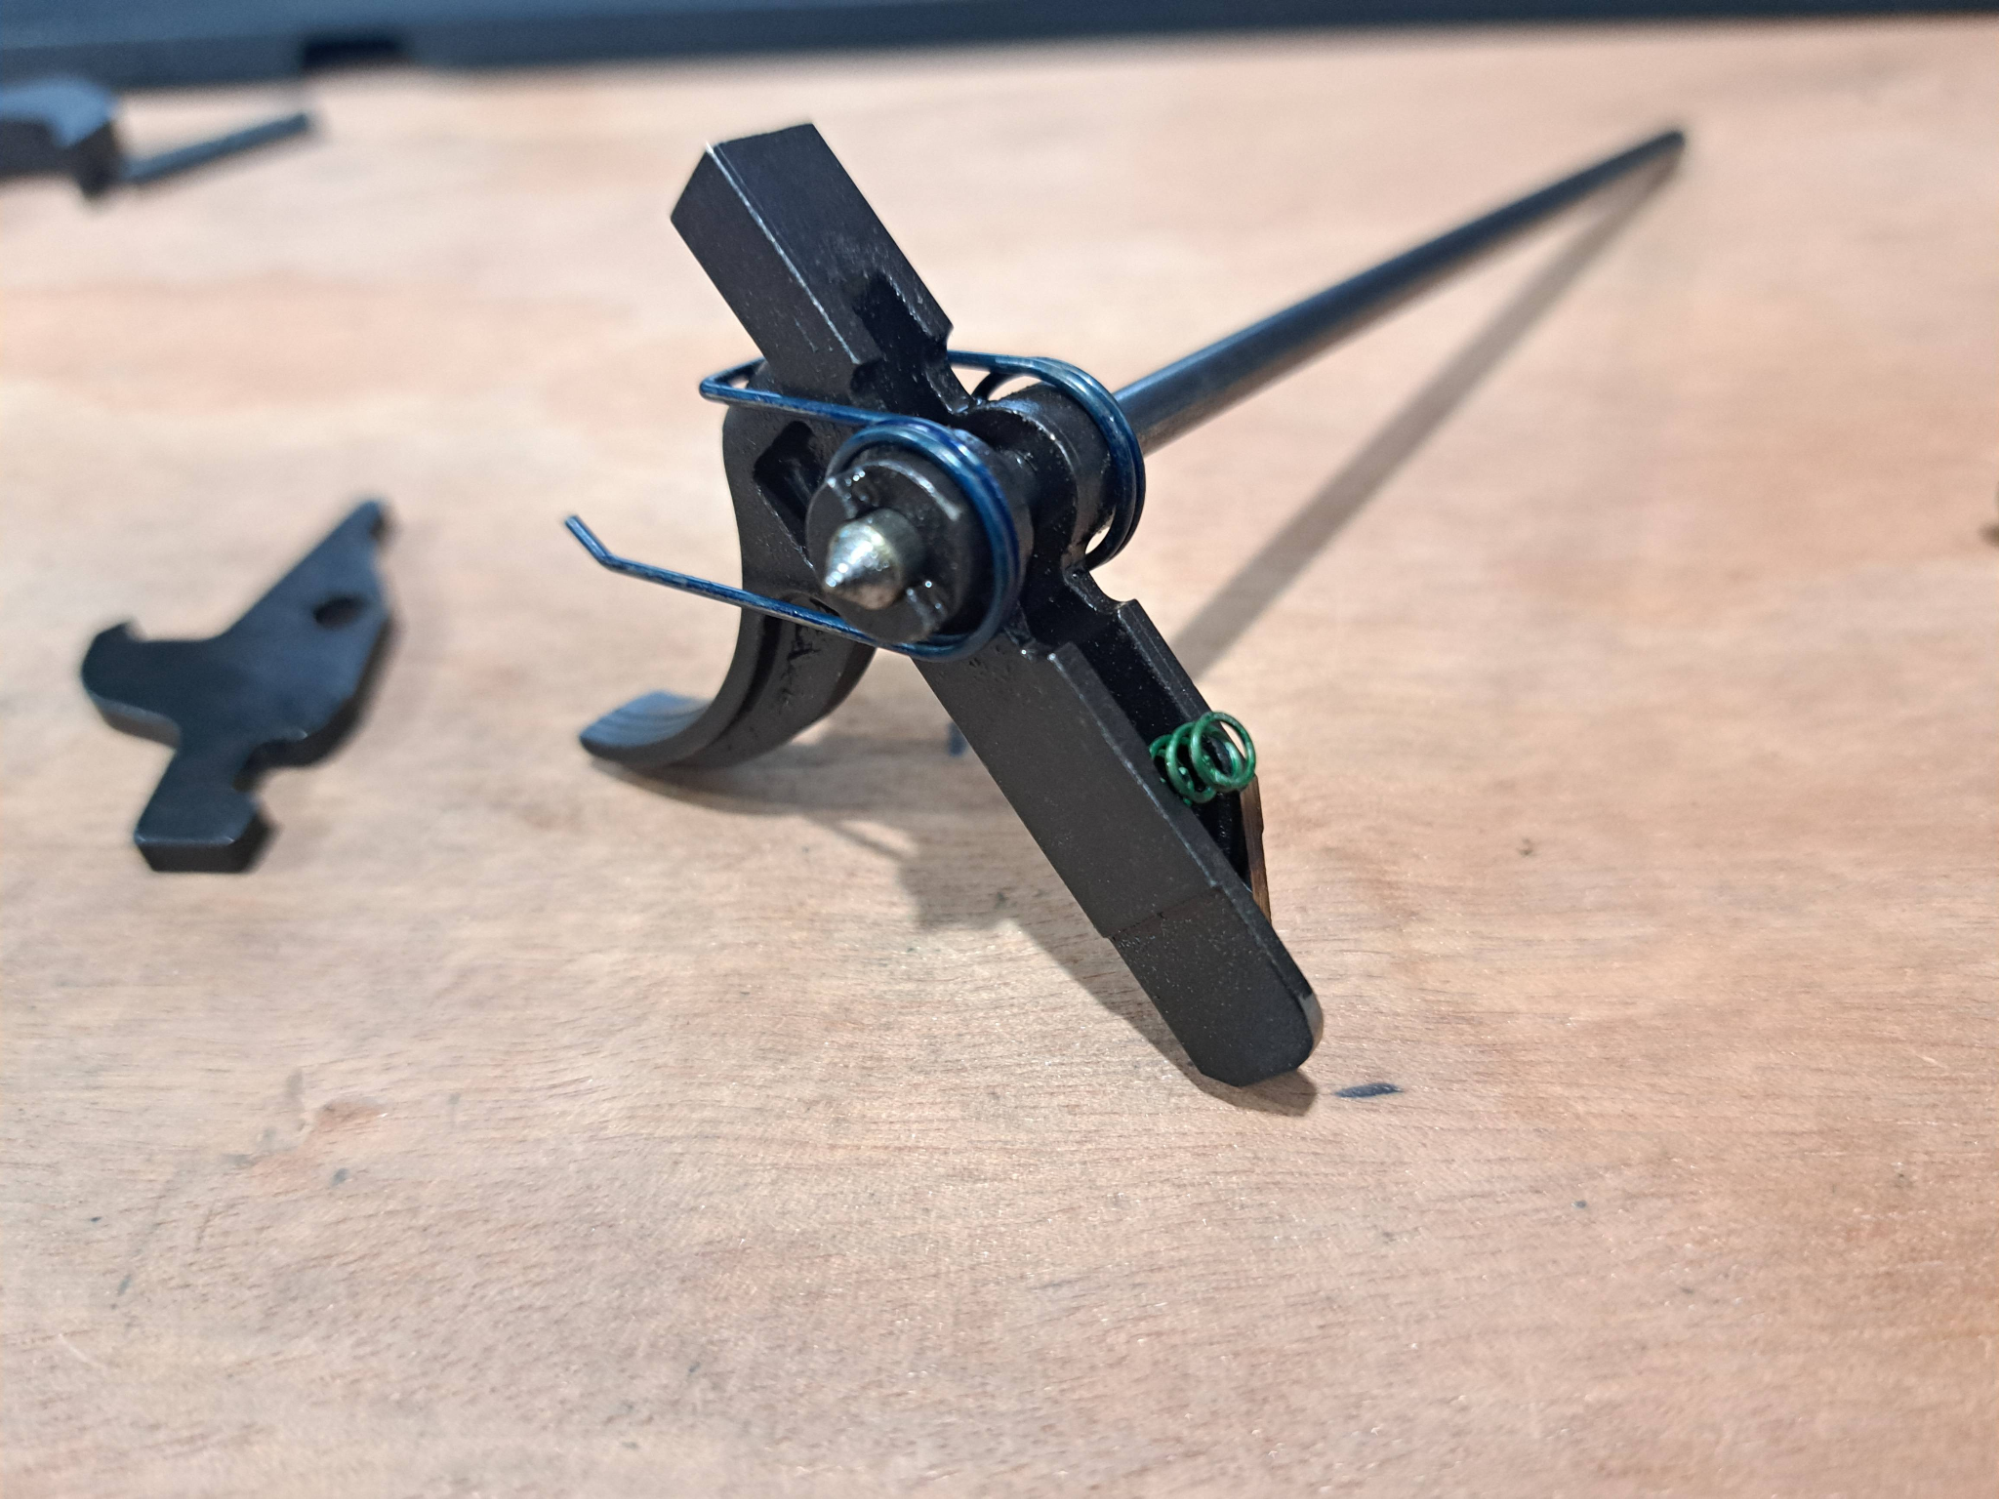
Safety Cam & Lever
The meat of the system. This part is milled from steel.
Cut Trigger
A modified milspec trigger which is required for the super safety to work.
Rounded Detent
A regular safety detent will work, however it will be unduly difficult to move the safety side to side to select which mode of operation. To round the detent, simply take the end of the point off via sandpaper or filing or rubbing it on concrete. The geometry of the detent should go from a triangular point to a trapezoidal “point”. Flattening the detent too far can cause malfunctions (Common Issues, Unable to pull trigger)
Plastic Spacer
The little plastic piece is for IF you have a full pocket / M16 lower receiver. It goes over the lever so that it stays centered in those rare lowers.
Trigger Jig
Plastic piece that a milspec trigger may fit into. Use a silver sharpe and cut the middle of your line. If you go all the way to where the jig is, it will likely be too far. Remember, it is easier to take material off than to add it back later.
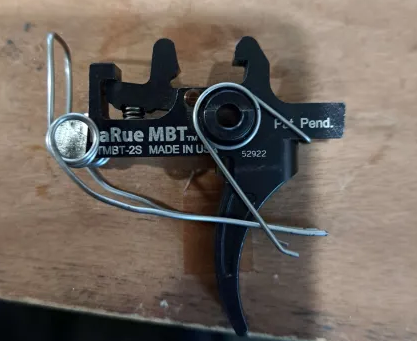
Custom Stainless Spring (Giessele SSA-E, Larue MBT Kits only)
This custom spring (folded from generic stainless lock wire) prevents the safety lever from overtraveling with trigger systems that have a smaller hammer. For milspec hammers, both semi auto and full auto, the hammer, as it is cocked by the bolt carrier group, taps the safety lever and pushes it rearward and upward to where it is able to be caught by the bolt carrier group. The Giessele SSA-E and Larue MBT hammers are not large enough to move the safety lever backwards. The spring goes under the whole trigger in the bottom of the lower receiver, providing a surface that pushes the lever backwards so that it can be caught by the BCG. Some people have shoved foam earplugs into their lower behind the trigger, this is a more elegant and durable solution.
Installation Guide
Be Smart

No, seriously. Clear the firearm, ensure that there’s no live ammunition, etc. Don’t win a Darwin award. Along those lines, the first time you fire it in active reset mode, think about only loading at most 3 into the mag so you don’t shoot the ceiling or the skyline.
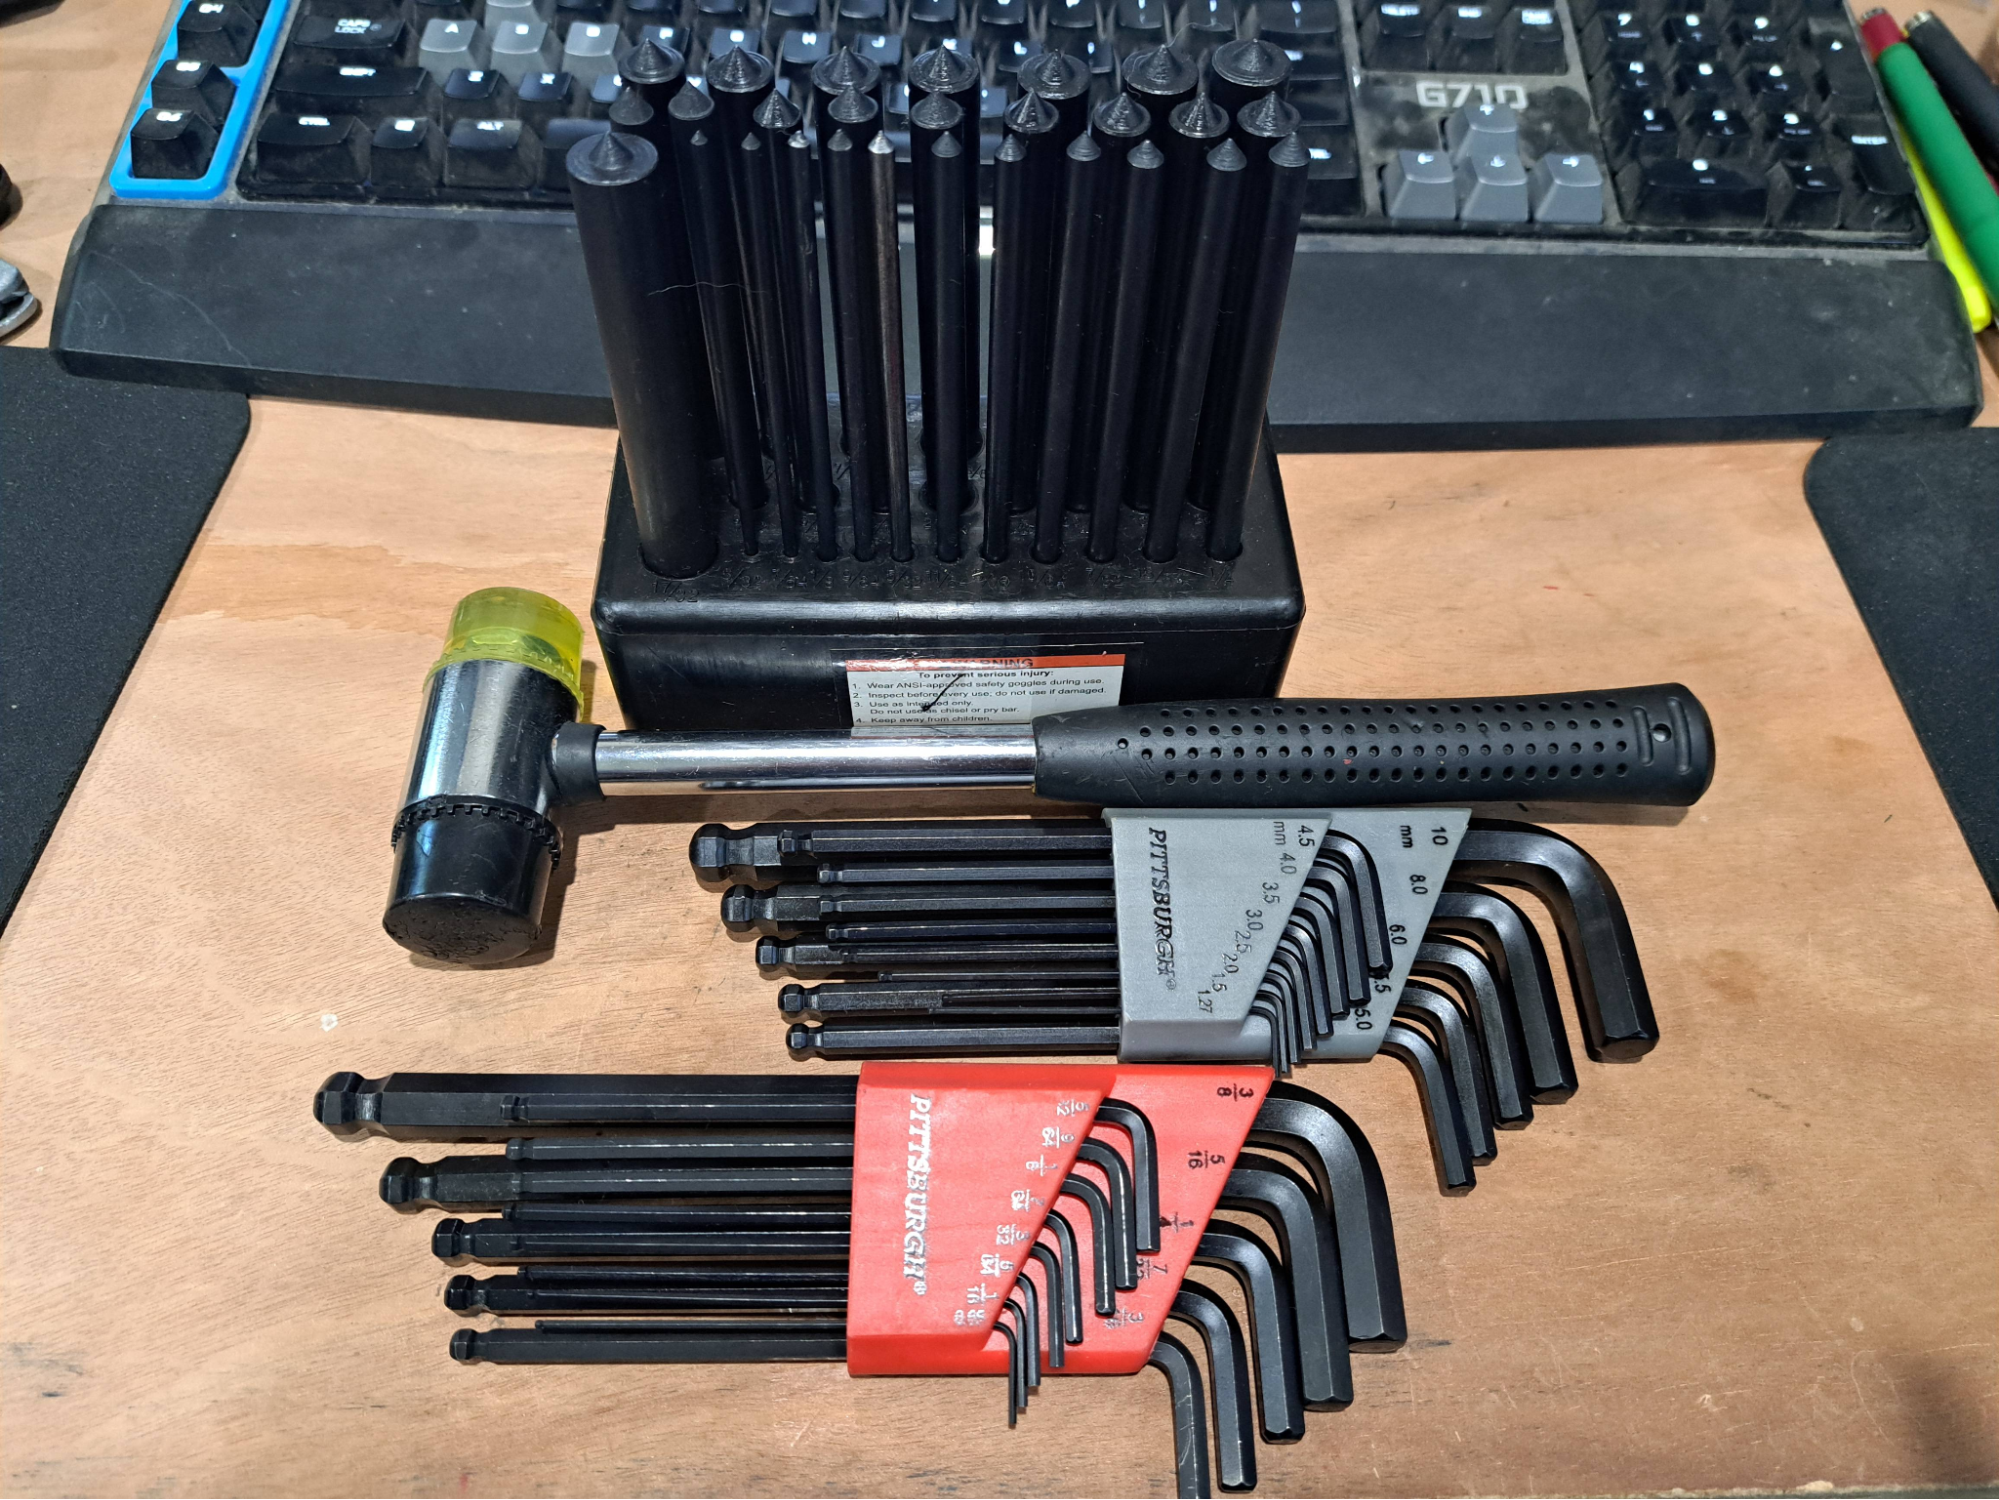
Recommended Tools
If you have an AR builder’s kit, you’re good to go already (and probably don’t need this section of the guide anyway). If not, Harbor Freight has everything you need (if you don’t already have it). I have purchased two of their punch sets (one for the shop and one for the road). At the time of writing, the punch set is $12.99 (https://www.harborfreight.com/28-piece-transfer-punch-set-3577.html). We only need the 5/32” punch. You probably already have a hammer. A set of allen keys can be helpful for removal of the pistol grip.
Removing Existing Parts
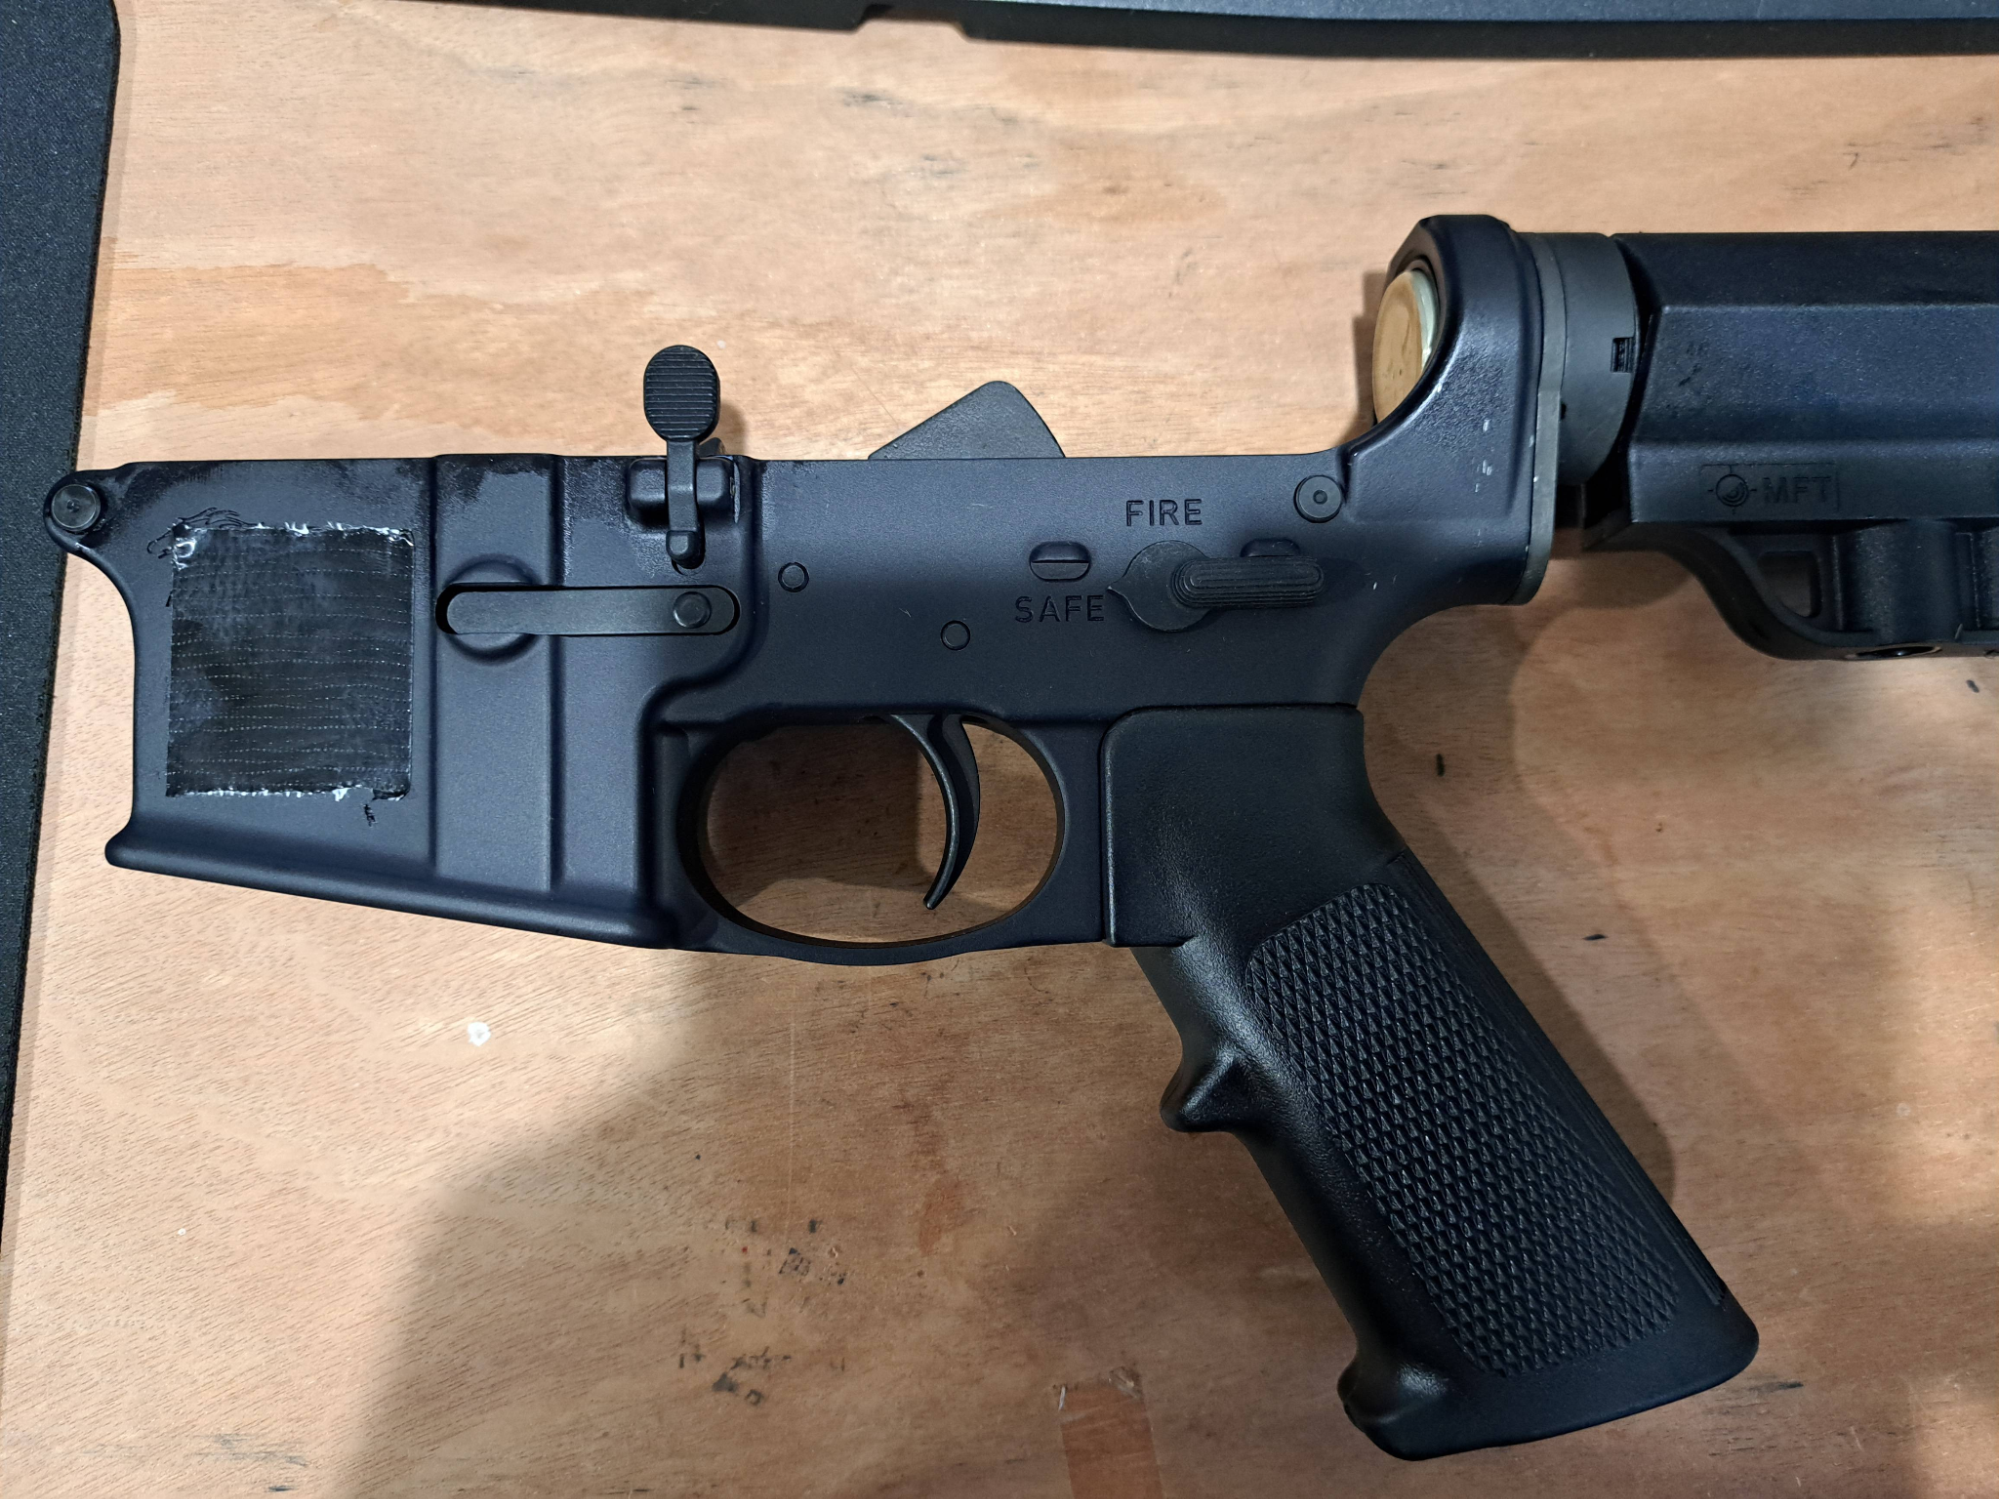
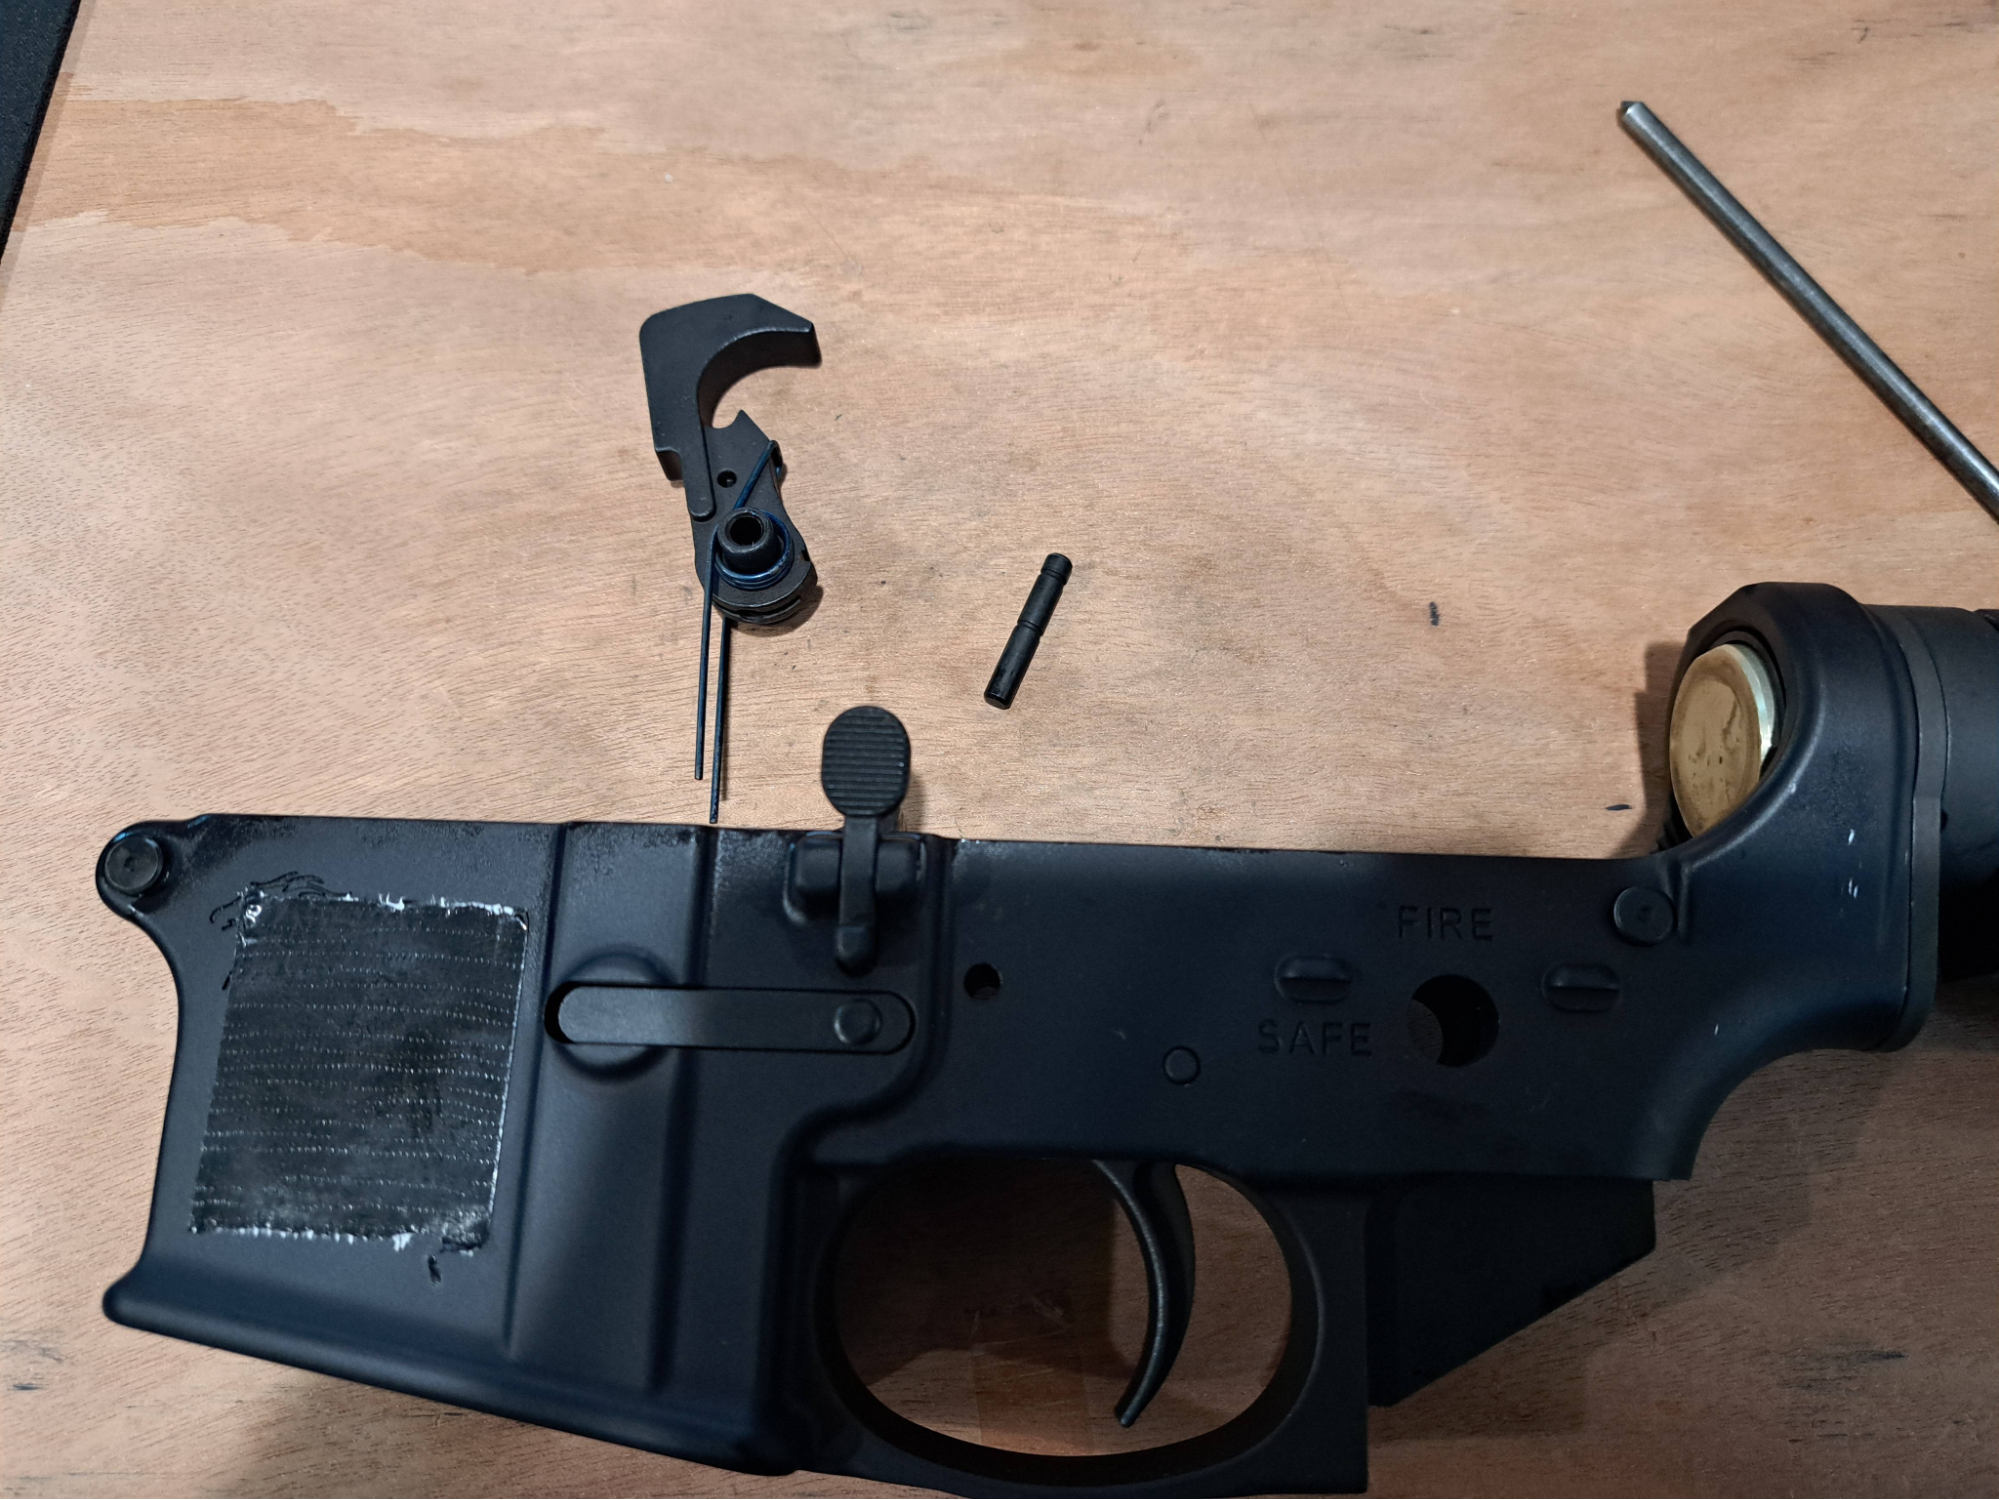
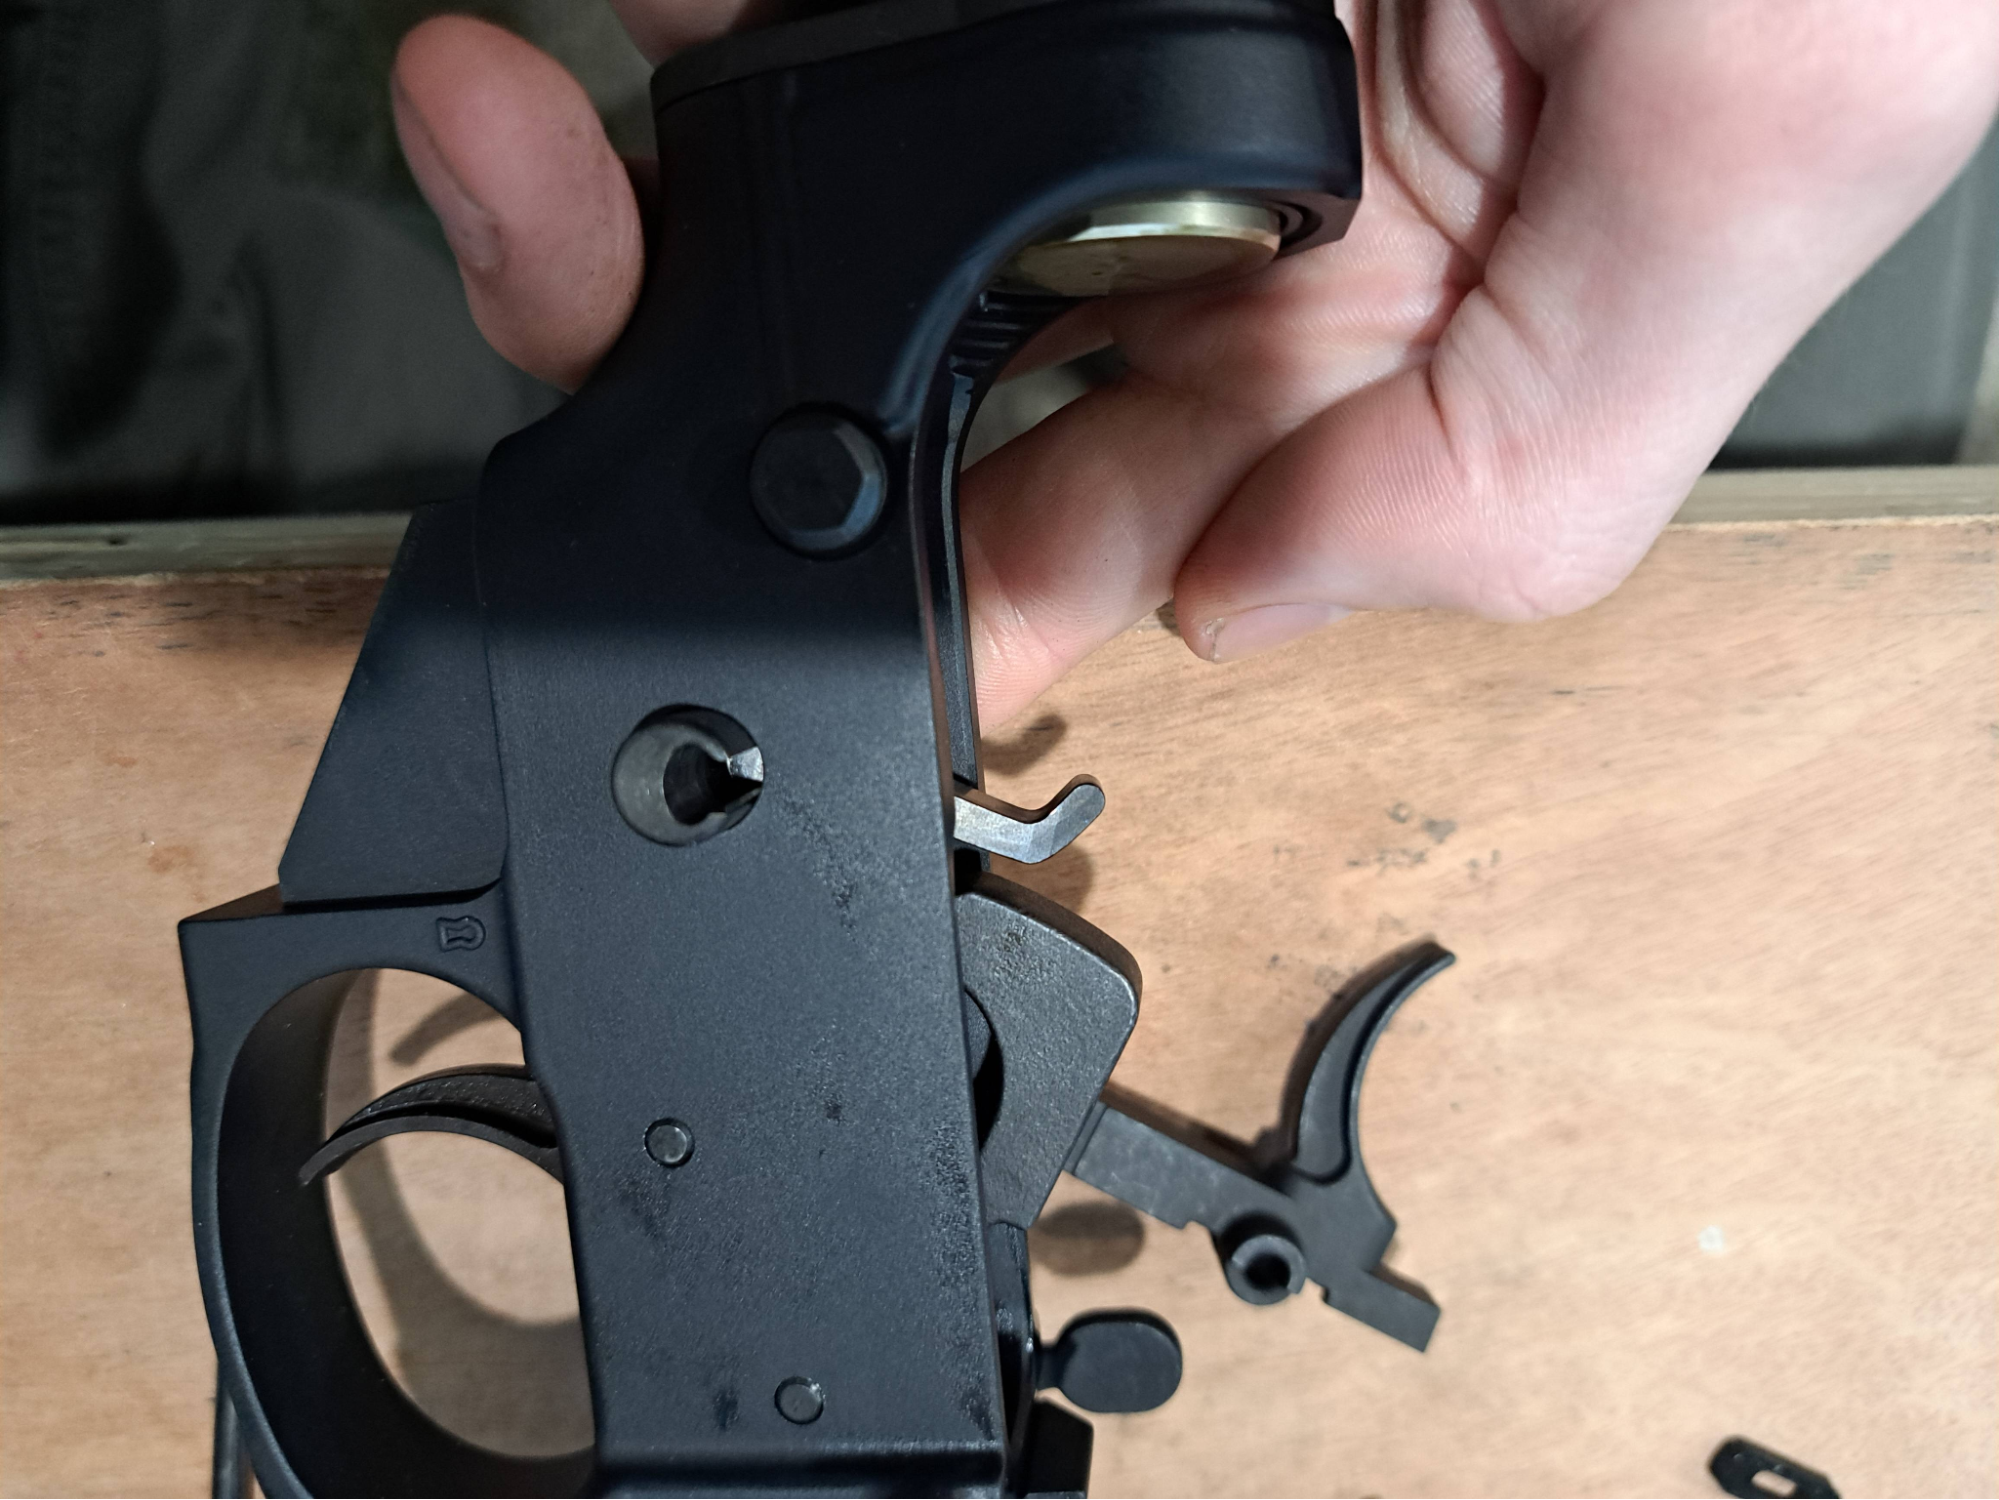
Remove the upper from your lower. (If your pins are tight, use a punch slightly smaller than 1/4” to knock out the takedown and pivot pins. You can oil them, or trim about 1/4” off the springs behind the detents there to make them easier to slide). Your lower should look something like this:
Removal of pistol grip, safety
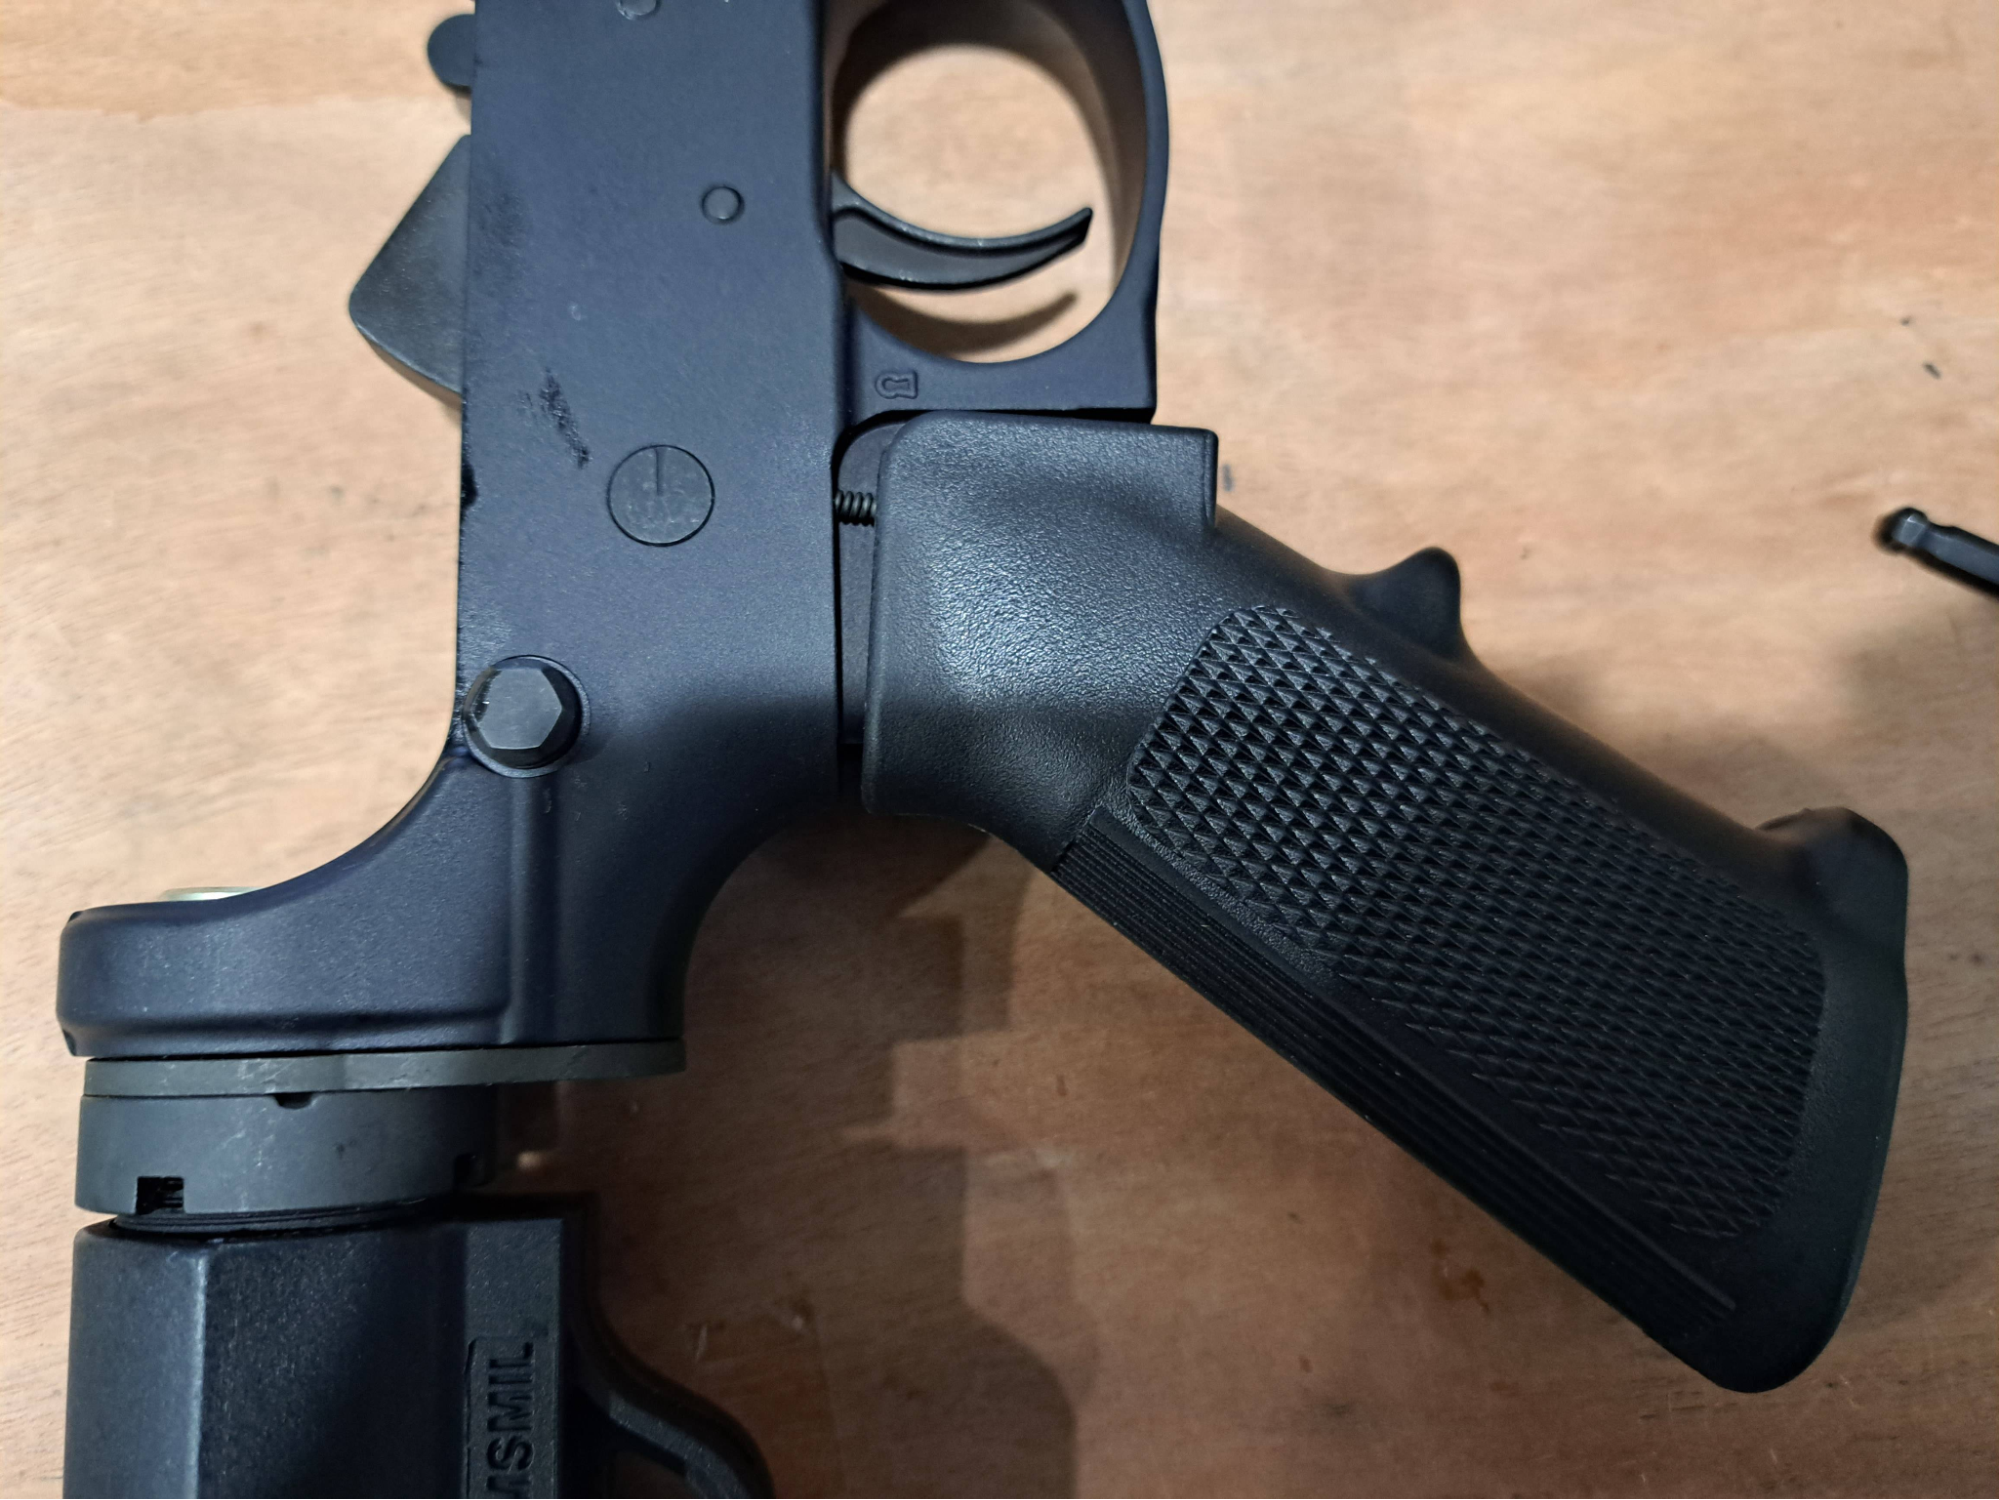
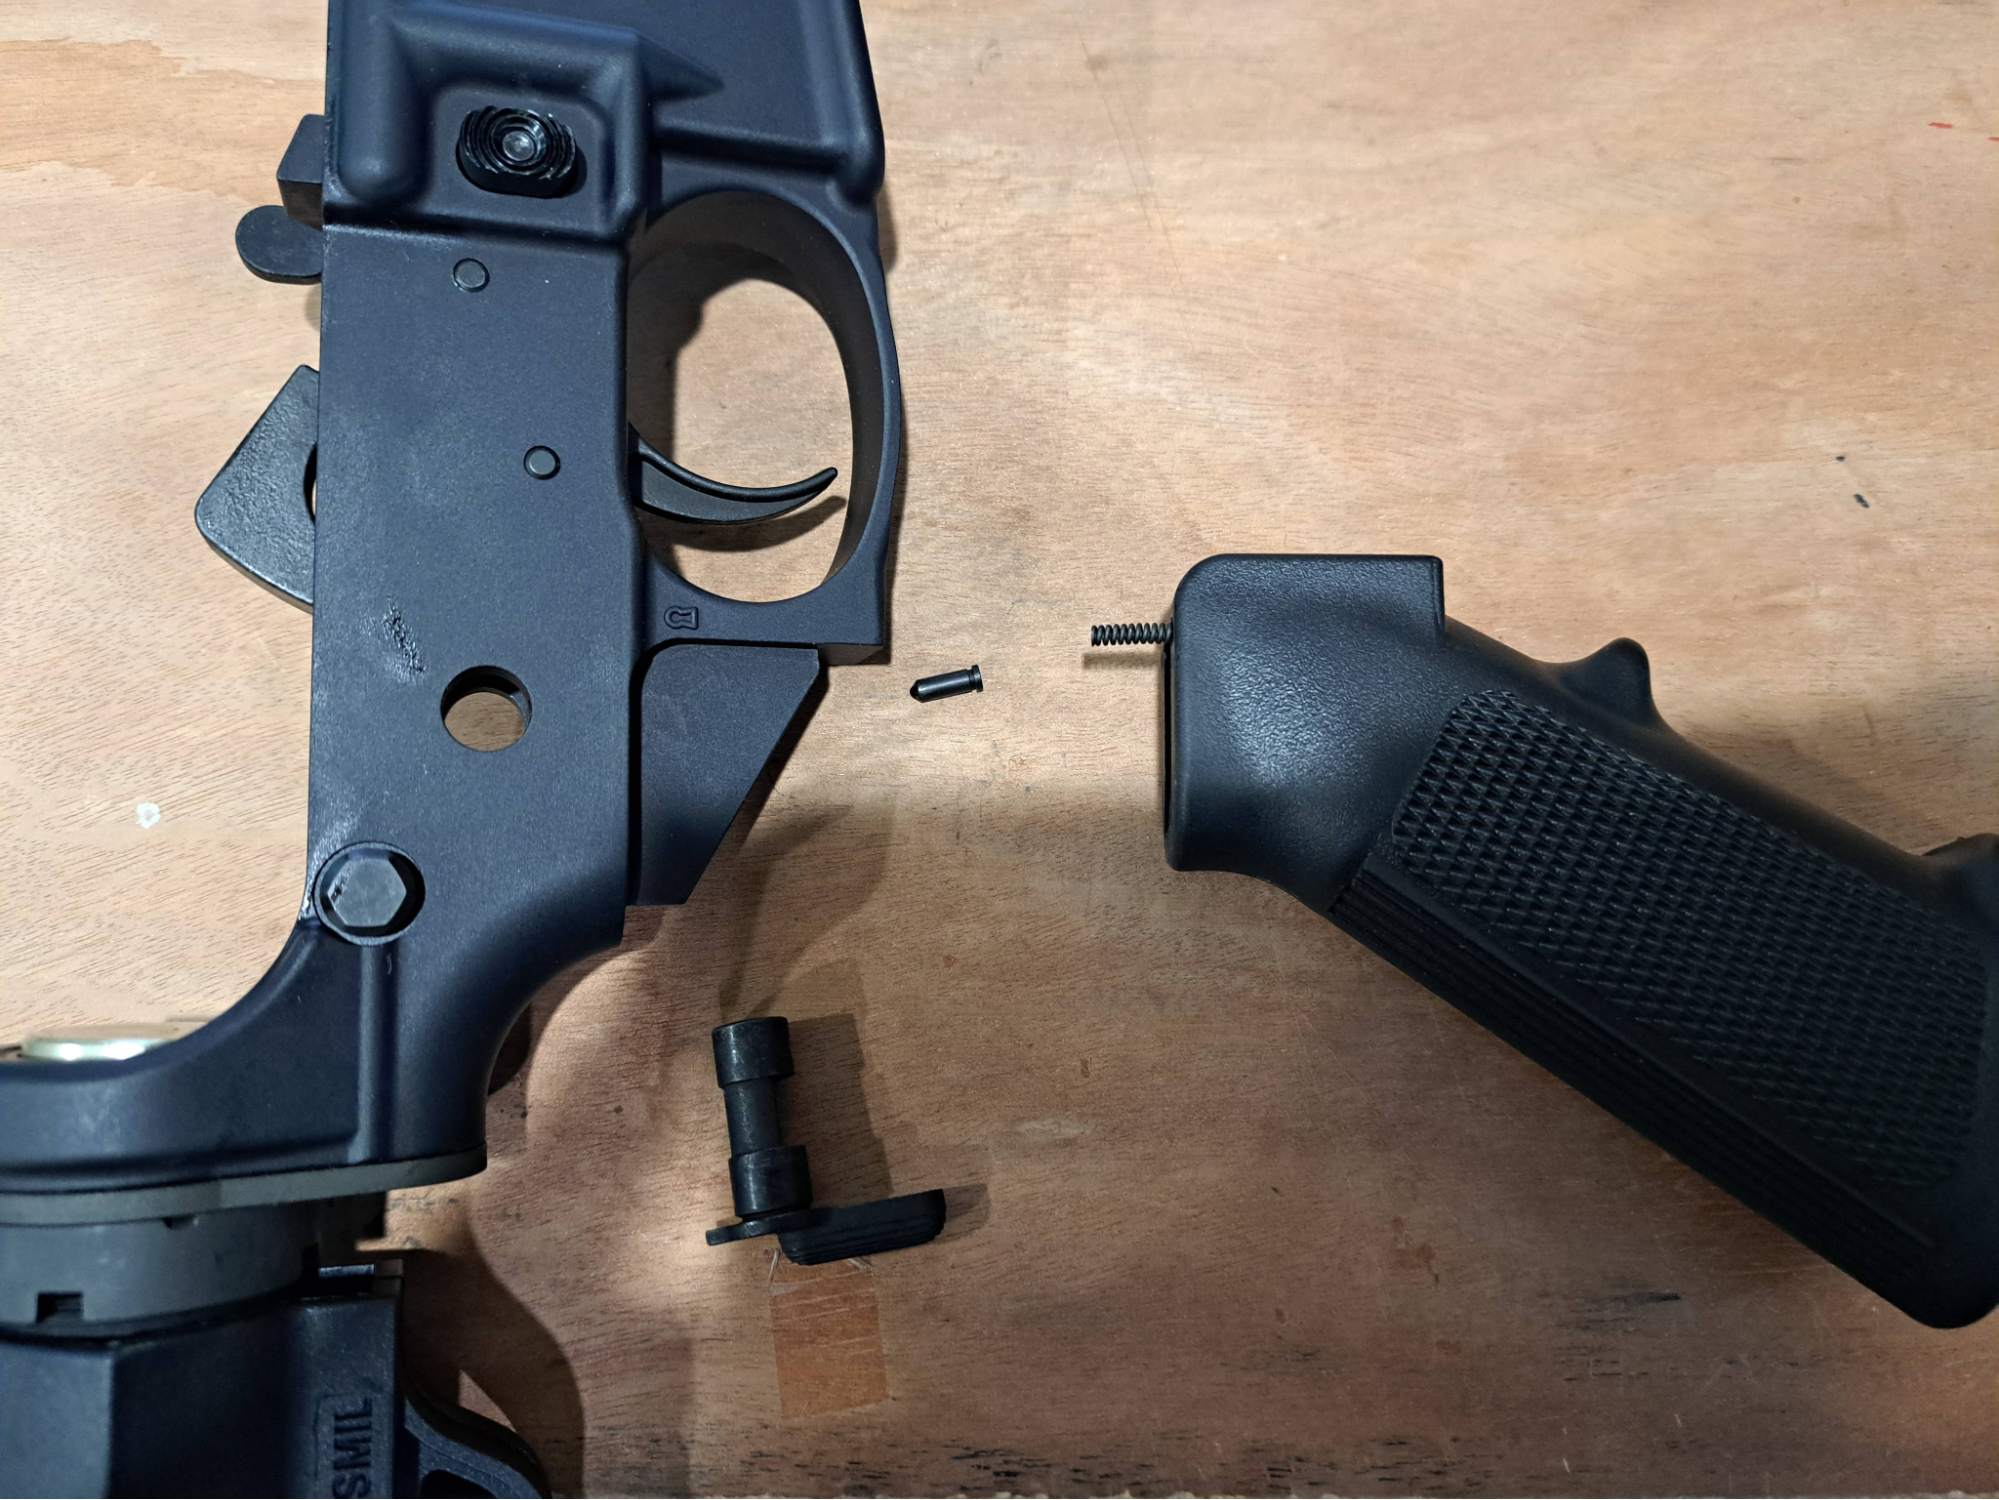
The safety is held in by a detent which itself is held by a spring seated in a hole in the pistol grip. Placing the lower on its left side, remove the pistol grip via the screw in the base (they are usually 3/16” hex sockets, though other screw heads exist). Make sure to keep the screw head flush against the end of the grip so that the screw doesn’t come out- it’s a pain to get it back in the hole, particularly if it’s a flat head. Be careful to not lose the spring or detent.
When the screw is completely out, I leave it and the safety detent spring in the grip and set it aside. Depending on how dirty and oiled your lower is, the safety detent may not want to come out. Let gravity help you here while you toggle the safety lever to get the detent to move. If it is very stuck, you can use a magnet to get it out, or push it out with the end of a paperclip from the hole where the safety was.
Removal of hammer, trigger
Using the 5/32” punch, knock out the hammer pin using the pointed end of the punch. I find it best to hold the lower across my lab, knock the pin halfway out, reach around with my left hand to grab the hammer pin between my fingers, and then tap it all the way out so that I don’t lose the pin. The hammer is then on the punch. As I pull the punch out, I grab over the hammer with my left hand and and squeeze it back just a little bit so that when the pin is out it is in my hand rather than flying across the room. If it’s stuck, pull the trigger and it will release into your hand. Set the hammer aside. If your lower is Cerakoted or painted or the pins are tight for some other reason, you can use a smaller punch to knock out the 5/32” punch, and then pull the smaller punch out easier using the steps described above.
Repeat the process for the trigger, being careful not to lose the disconnector.
Installation of the trigger
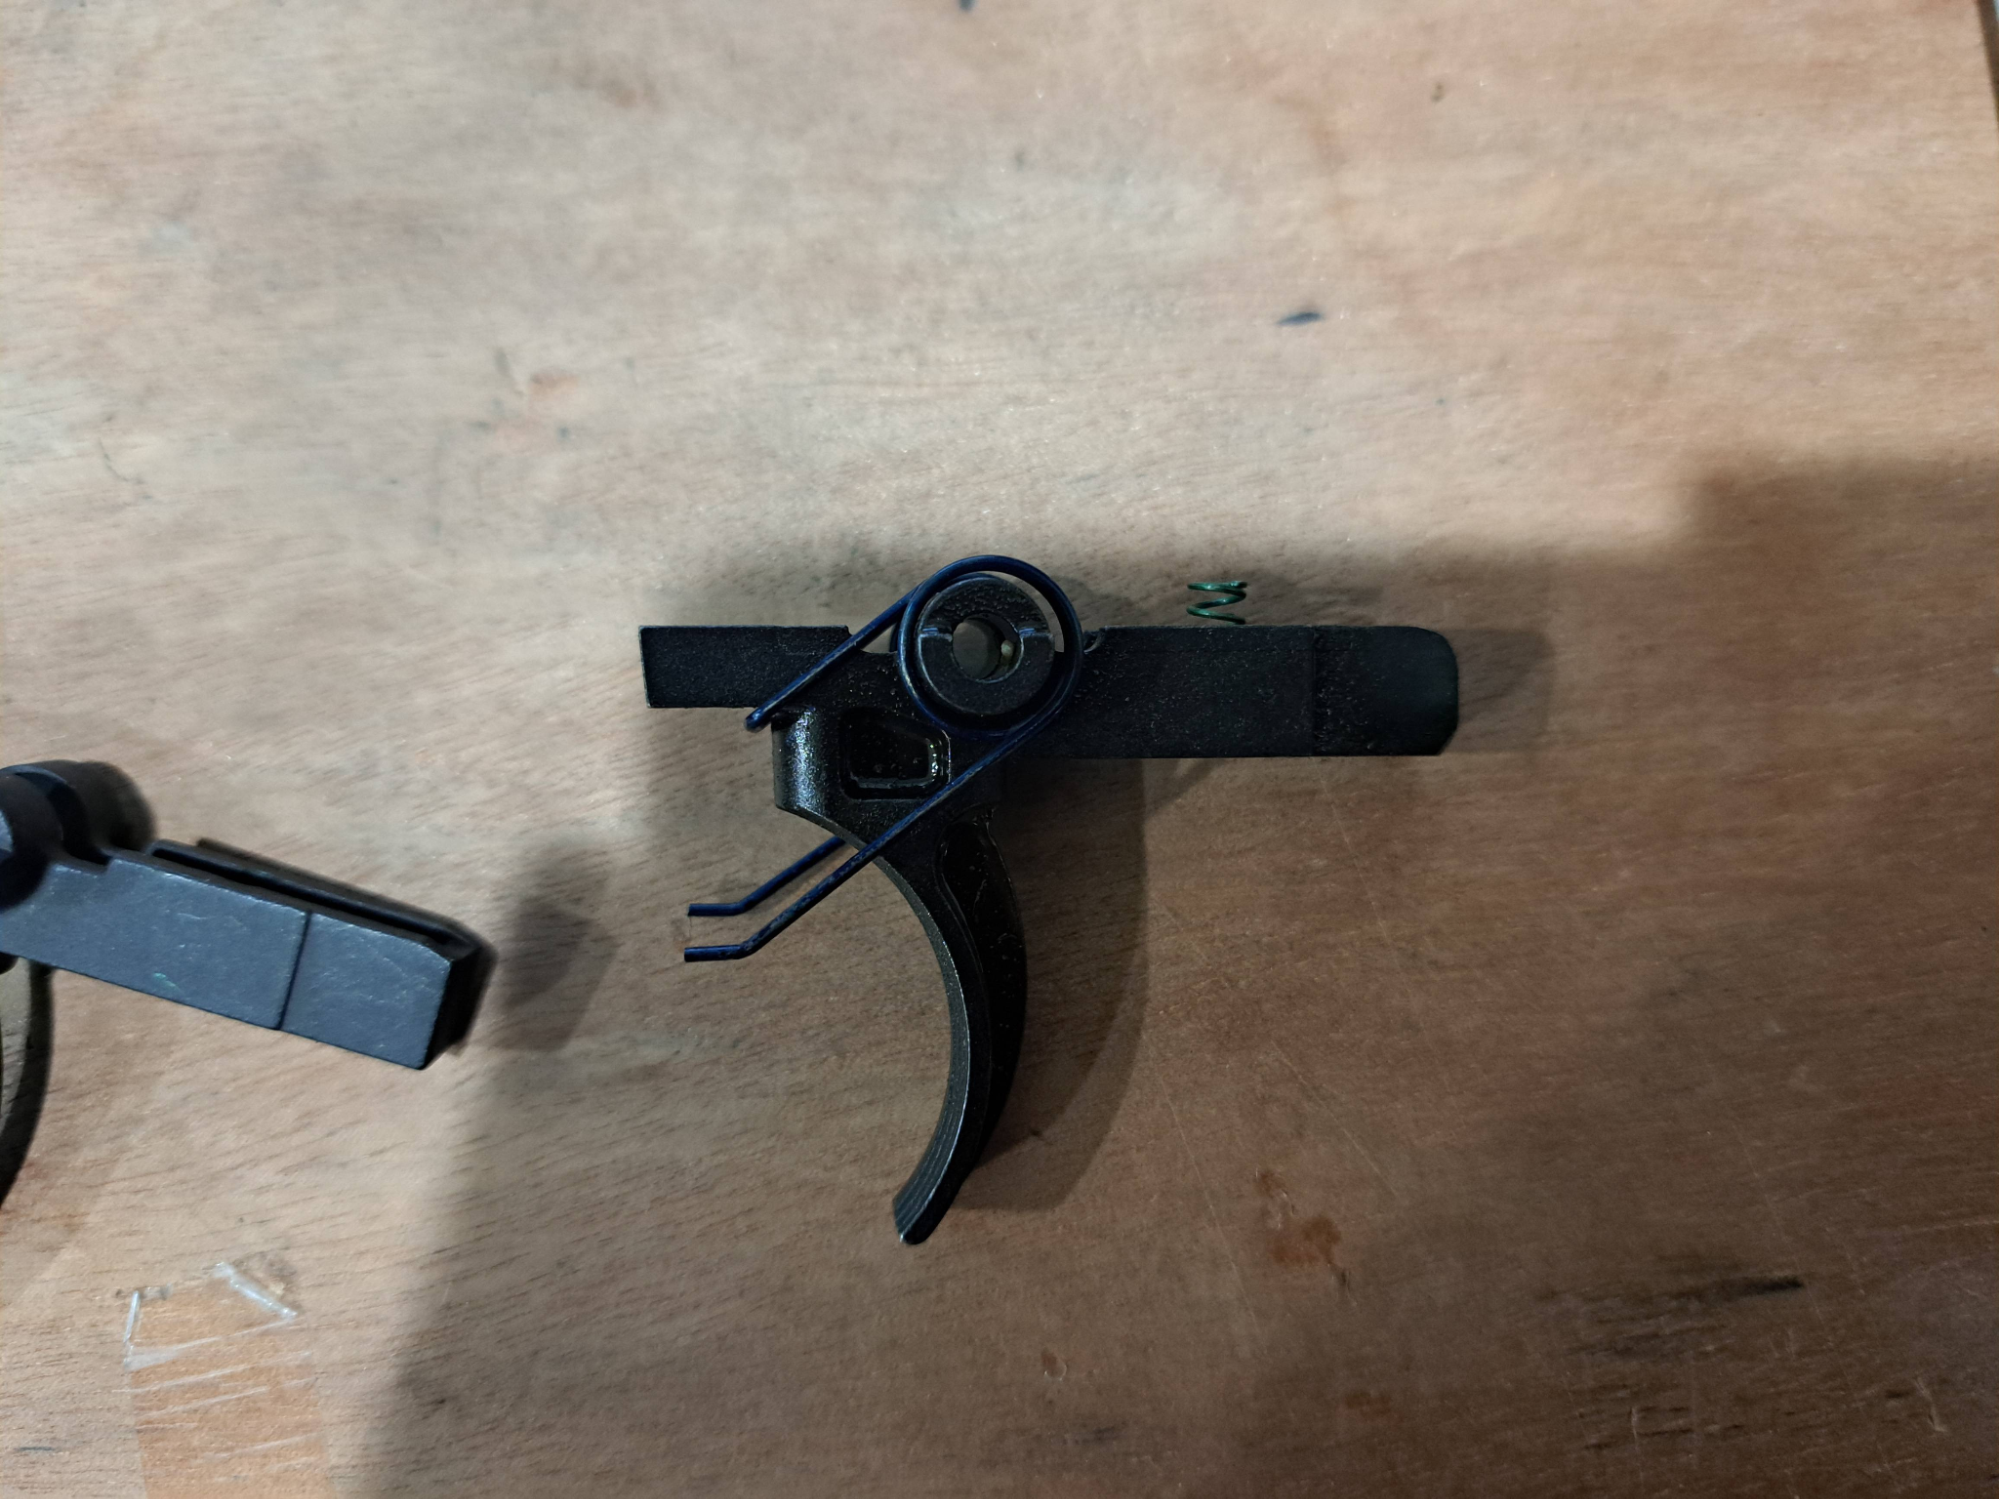
The milspec trigger has 4 components: the trigger shoe, the disconnector, the disconnector spring, and the trigger spring. Remove the disconnector spring and trigger spring from your trigger shoe, and install them into the modified trigger shoe. The disconnector spring can be a pain to take out, use a tiny punch or needle nose pliers to pull it out. When installing the disconnector spring in the modified trigger, don’t put it upside down like the trigger I removed for these pictures- the wider part of the spring goes DOWN. Use a tiny punch or allen key to seat it if you have difficulty. After the same fashion, install the trigger spring on the modified trigger.
To install the trigger, place it in the lower receiver and place the disconnector inside of it. Use the pointed end of the punch to get everything aligned easily, and knock the punch out with the trigger pin. If you are having trouble with the disconnector, check that there aren’t burrs on the clearance cut of the trigger, deburr if necessary.
To install the hammer, place it in the lower. I find that it is easier to have the hammer cocked rather than uncocked for aligning the punch. Knock the punch out with the hammer pin and everything should be good to go.
Instillation of the safety
If you have a left-handed safety, mirror left/right.
If you have a full pocket or M16 lower (that is, if the inside of the lower doesn’t get smaller where the safety goes), install the spacer block over the safety lever. It will be very difficult to get over the bend of the lever, and if the plastic bends or discolors or anything that’s fine - it doesn’t take any wear. You may need to sand/file the plastic on the ends just a little bit to get it to fit inside the lower. This guide does not use it because of the many lowers I have, none are full pocket. You probably don’t need the spacer.
Insert the safety drum in from the left side of the receiver a little way, holding the safety lever so that the drum can slide over it, capturing it. The lever should tilt away from the hammer. Tilting the receiver onto its left side, and holding the safety drum in with your left hand, insert the rounded/modified safety detent into the hole where it goes, while still holding the receiver on its left side so the detent doesn’t slide out. Next install the pistol grip by screwing it in, making sure the pistol grip spring is still where it goes. Once the safety detent spring is putting pressure on the safety detent, everything will set into place and be captive and you don’t have to hold things in place anymore.
If your safety is very difficult to move side to side, now is a good time to fix that. Either the detent is insufficiently rounded, or there is too much spring tension (usually the latter). To make the safety easier to move, clip off 1/8” of the safety detent spring. Go slow, you can always remove material but not put it back so easily.
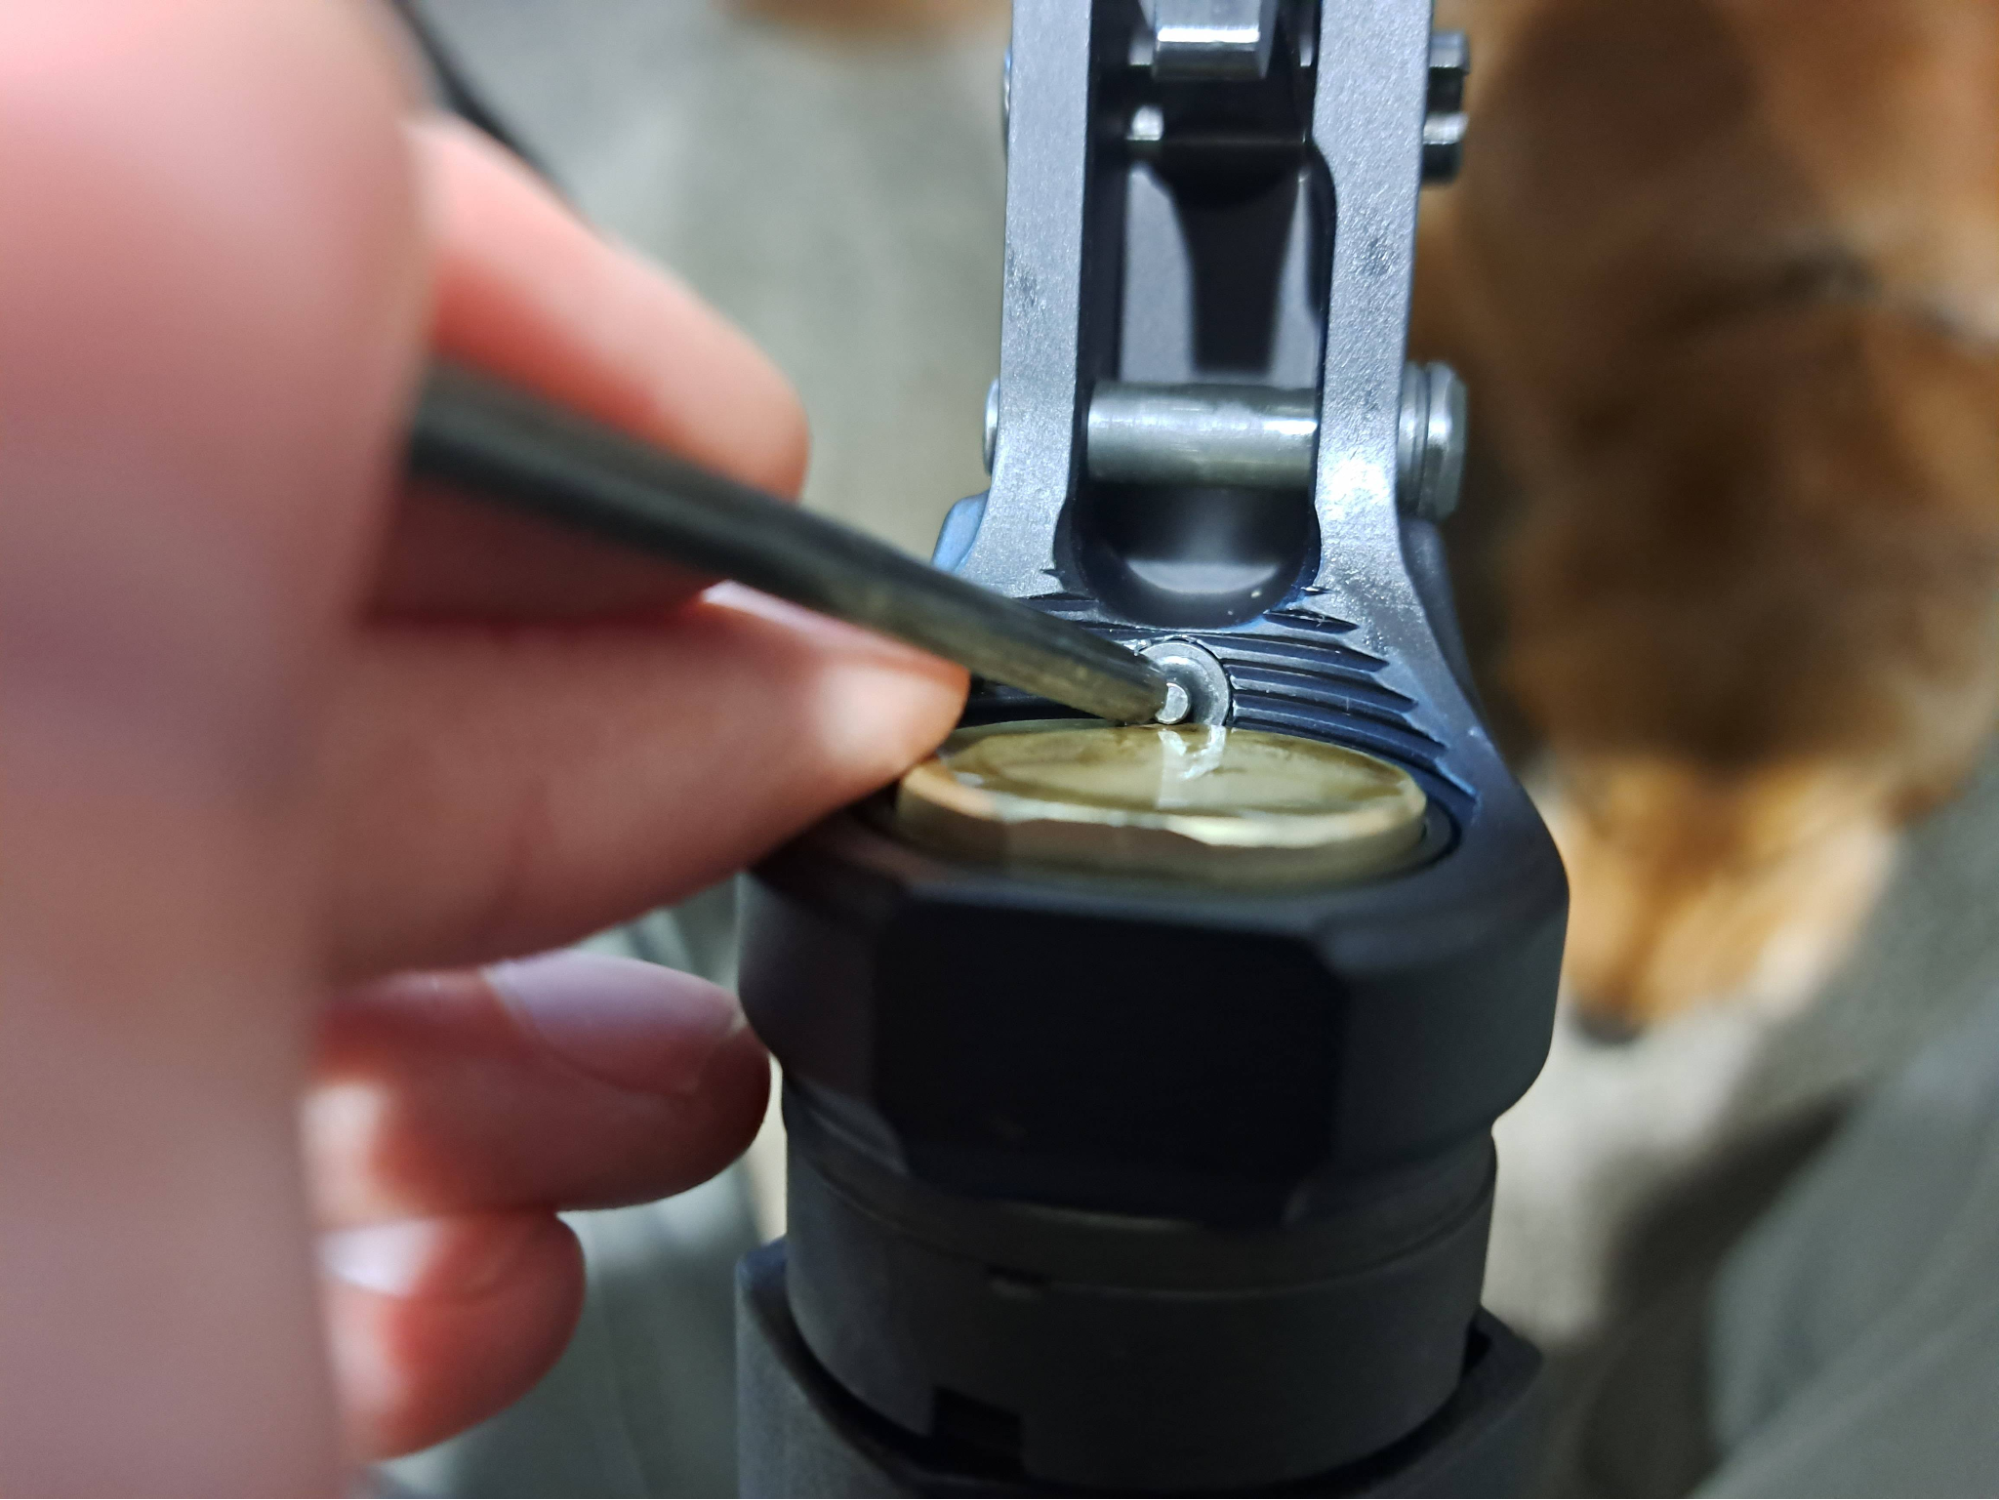
Changing Buffers
We recommend upgrading to an H2 buffer (see common issues). To do this, depress the buffer retainer pin down with a punch (or your fingernail if you’re brave). The buffer and spring will come forward out of the receiver extension (AKA “buffer tube”.) Pull out the old one, put in the new. Now is a good time to apply grease to your spring so it isn’t so loud while it cycles. Red grease is fine, slather it up, it won’t hurt anything. Finally, push the buffer back into the tube and it is done.
Function testing
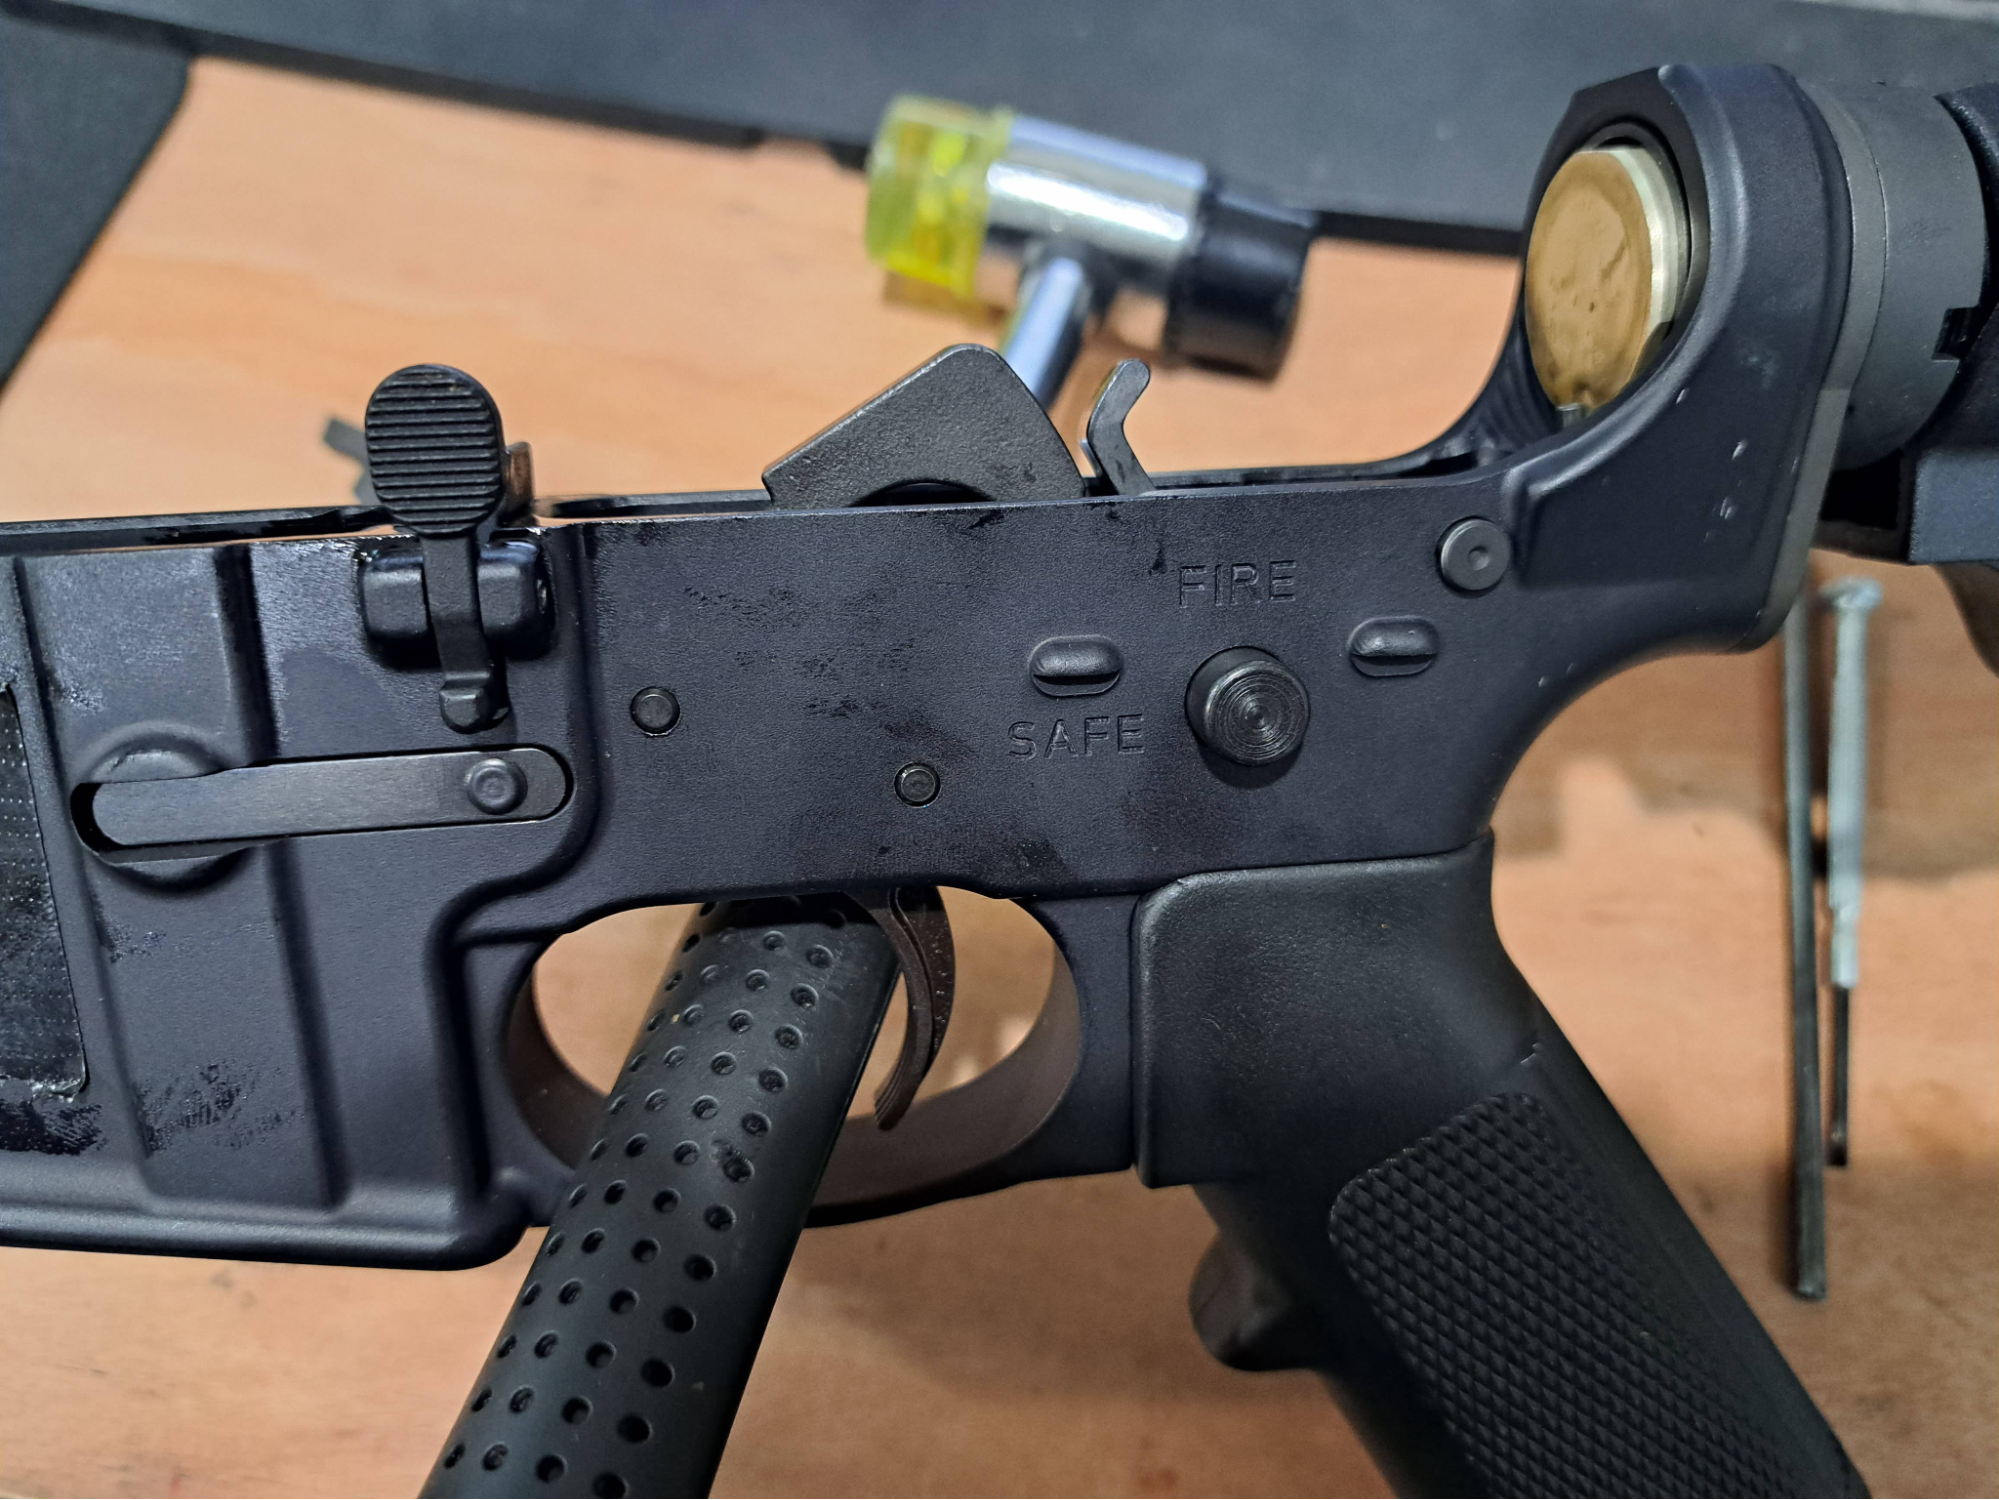
With the upper still removed, and with the safety lever forward and the hammer cocked, move the safety to the “safe” position (all the way left for normal safety drums, all the way right for left handed drums). Nothing should happen.
Next move the safety to semiautomatic, all the way right. Pull the trigger and keep it held back. Catch the hammer as it drops if you’re worried about scuffing anything. While keeping the trigger pulled, recock the hammer. Then, with the trigger still pulled, move the safety lever all the way back and then all the way forward, simulating what happens during cycling. Nothing should happen. Release the trigger, and the hammer should fall from the disconnector to the trigger with a click. Repeat if you wish.
Finally, move the safety to the middle forced reset position. Repeat the same steps that you did for the semi automatic position. Pull the trigger, keep it pulled, catch the hammer and reset it. Move the safety lever rearward, and as you do, the trigger should move forward, allowing the hammer to fall from the disconnector to the trigger. While continuing to pull on the trigger, when you move the lever back forward, it should allow you to pull the trigger, dropping the hammer again. If this doesn’t happen, refer to the next chapter. Cock the hammer, make sure that the lever is forward, and put the upper back on and you’re ready to go!
Common Issues and Troubleshooting
Bolt carrier group stuck in rear
This is the most common hiccup with the super safety is experienced directly after installation: you go to charge your gun and the bolt carrier group (BCG) sticks in the backwards position. This has a number of causes and simple solutions. You can tap the muzzle of your gun onto the ground and that should release the BCG.
Causes: friction/lack of clearance between the bottom of the BCG and the top of the lever.
Comments: This is normal when on a fresh install. Your BCG has never had any polishing there, and the lever isn’t polished yet. Any microscopic marks or abrasions will catch on each other and instead of sliding smoothly across each other, the BCG will catch the lever and try to move it forward, rotating it up into the BCG, and sticking it further. A bit of oil and a magazine of forced reset live fire will get everything smooth.
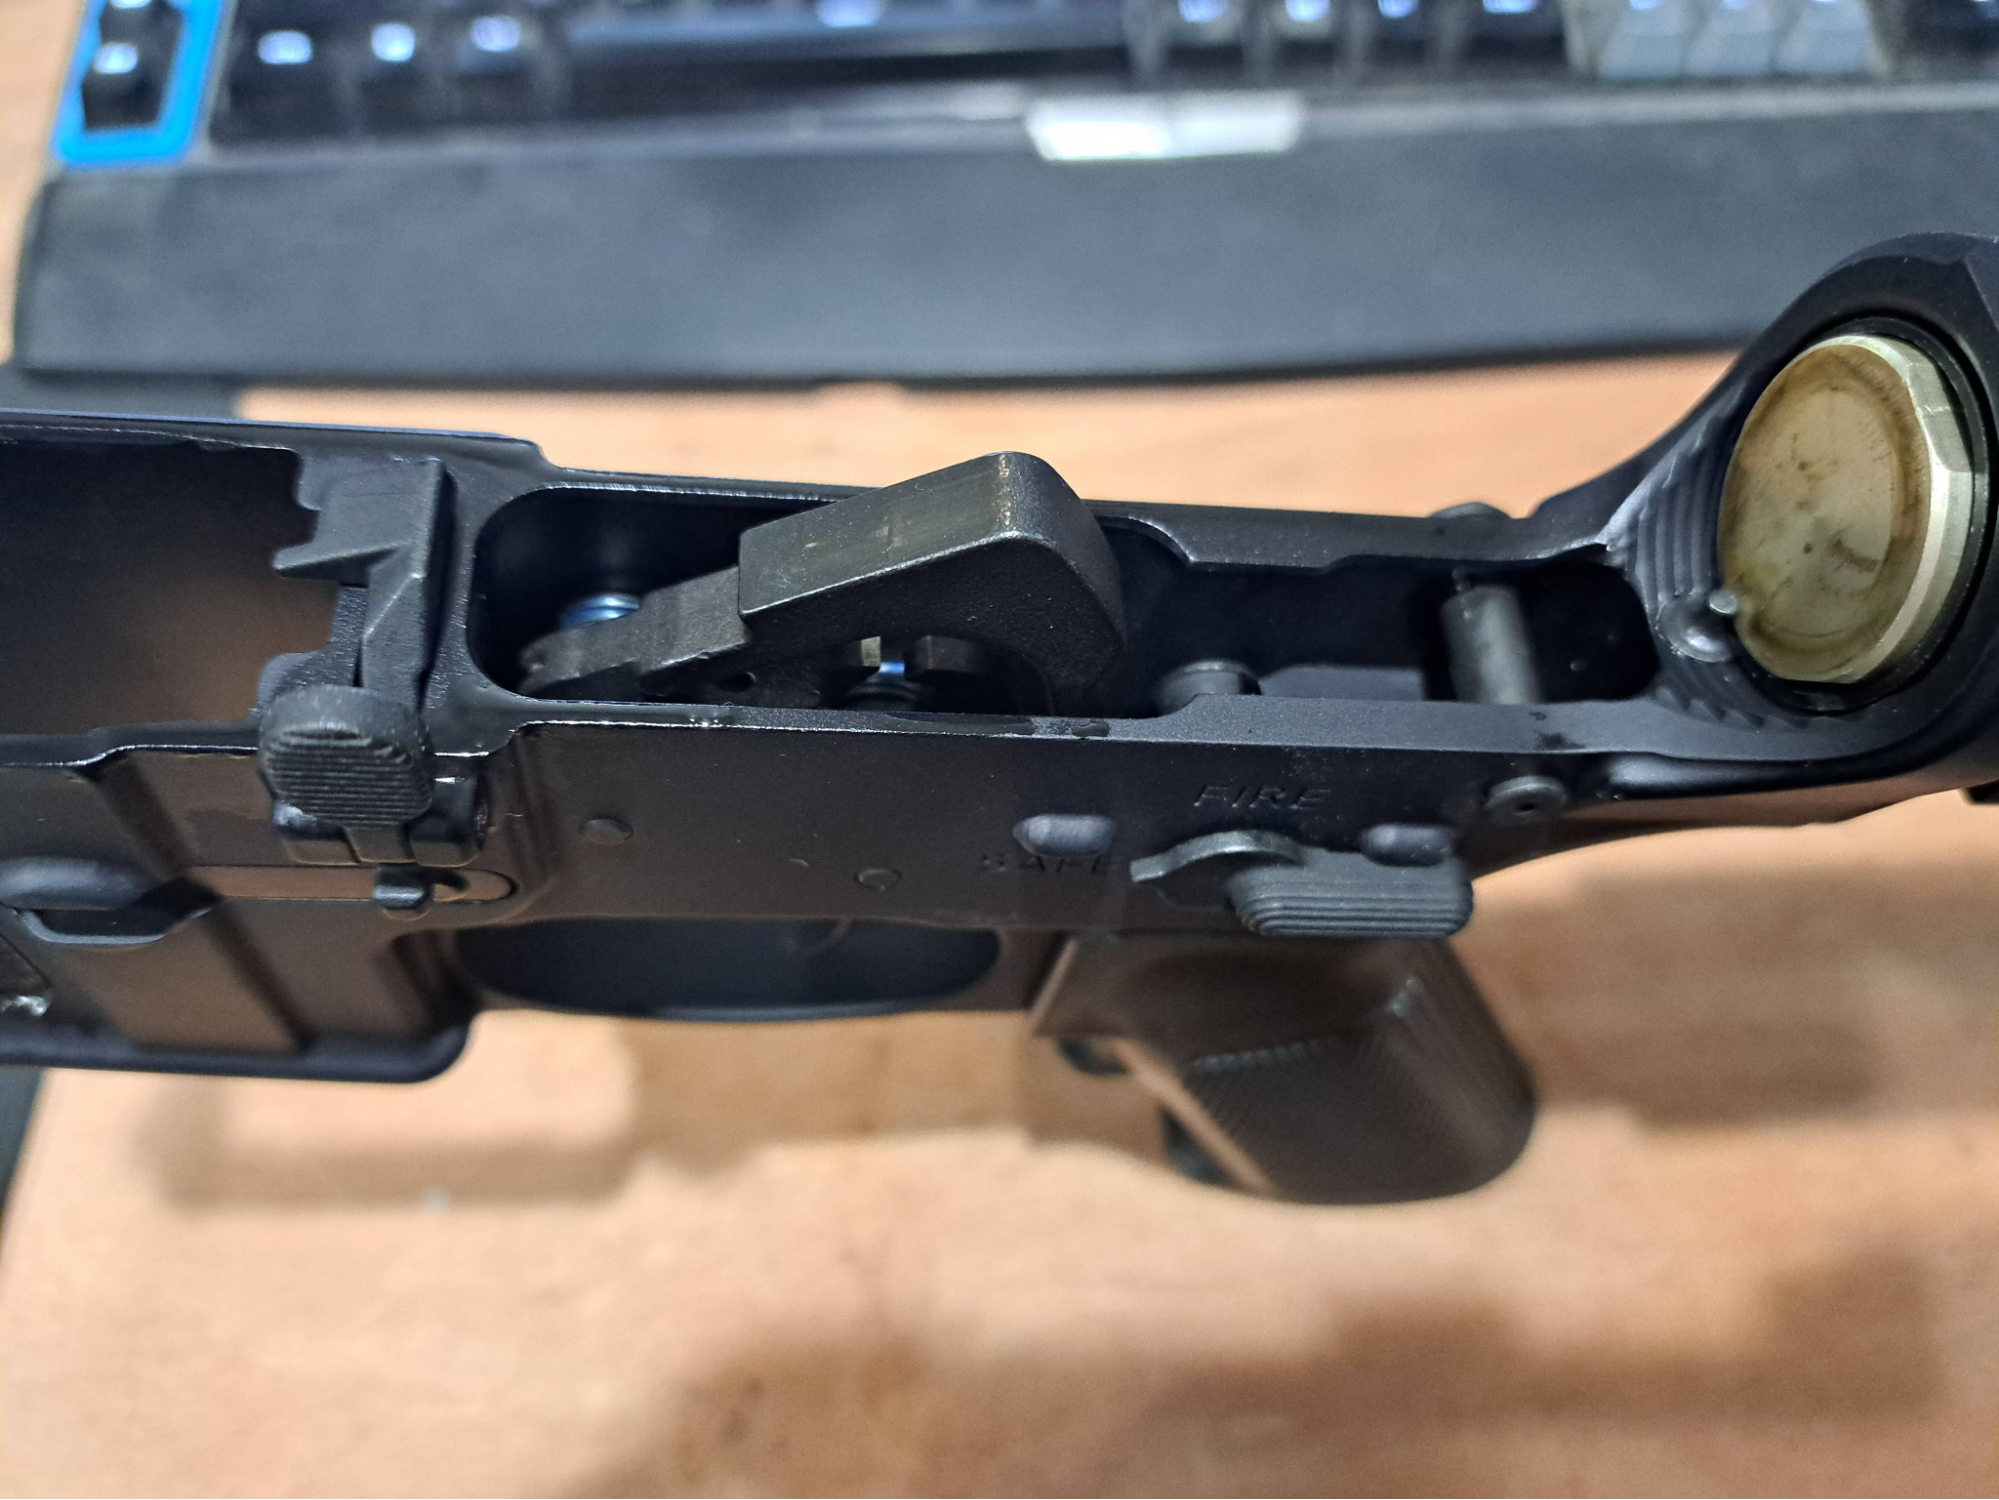
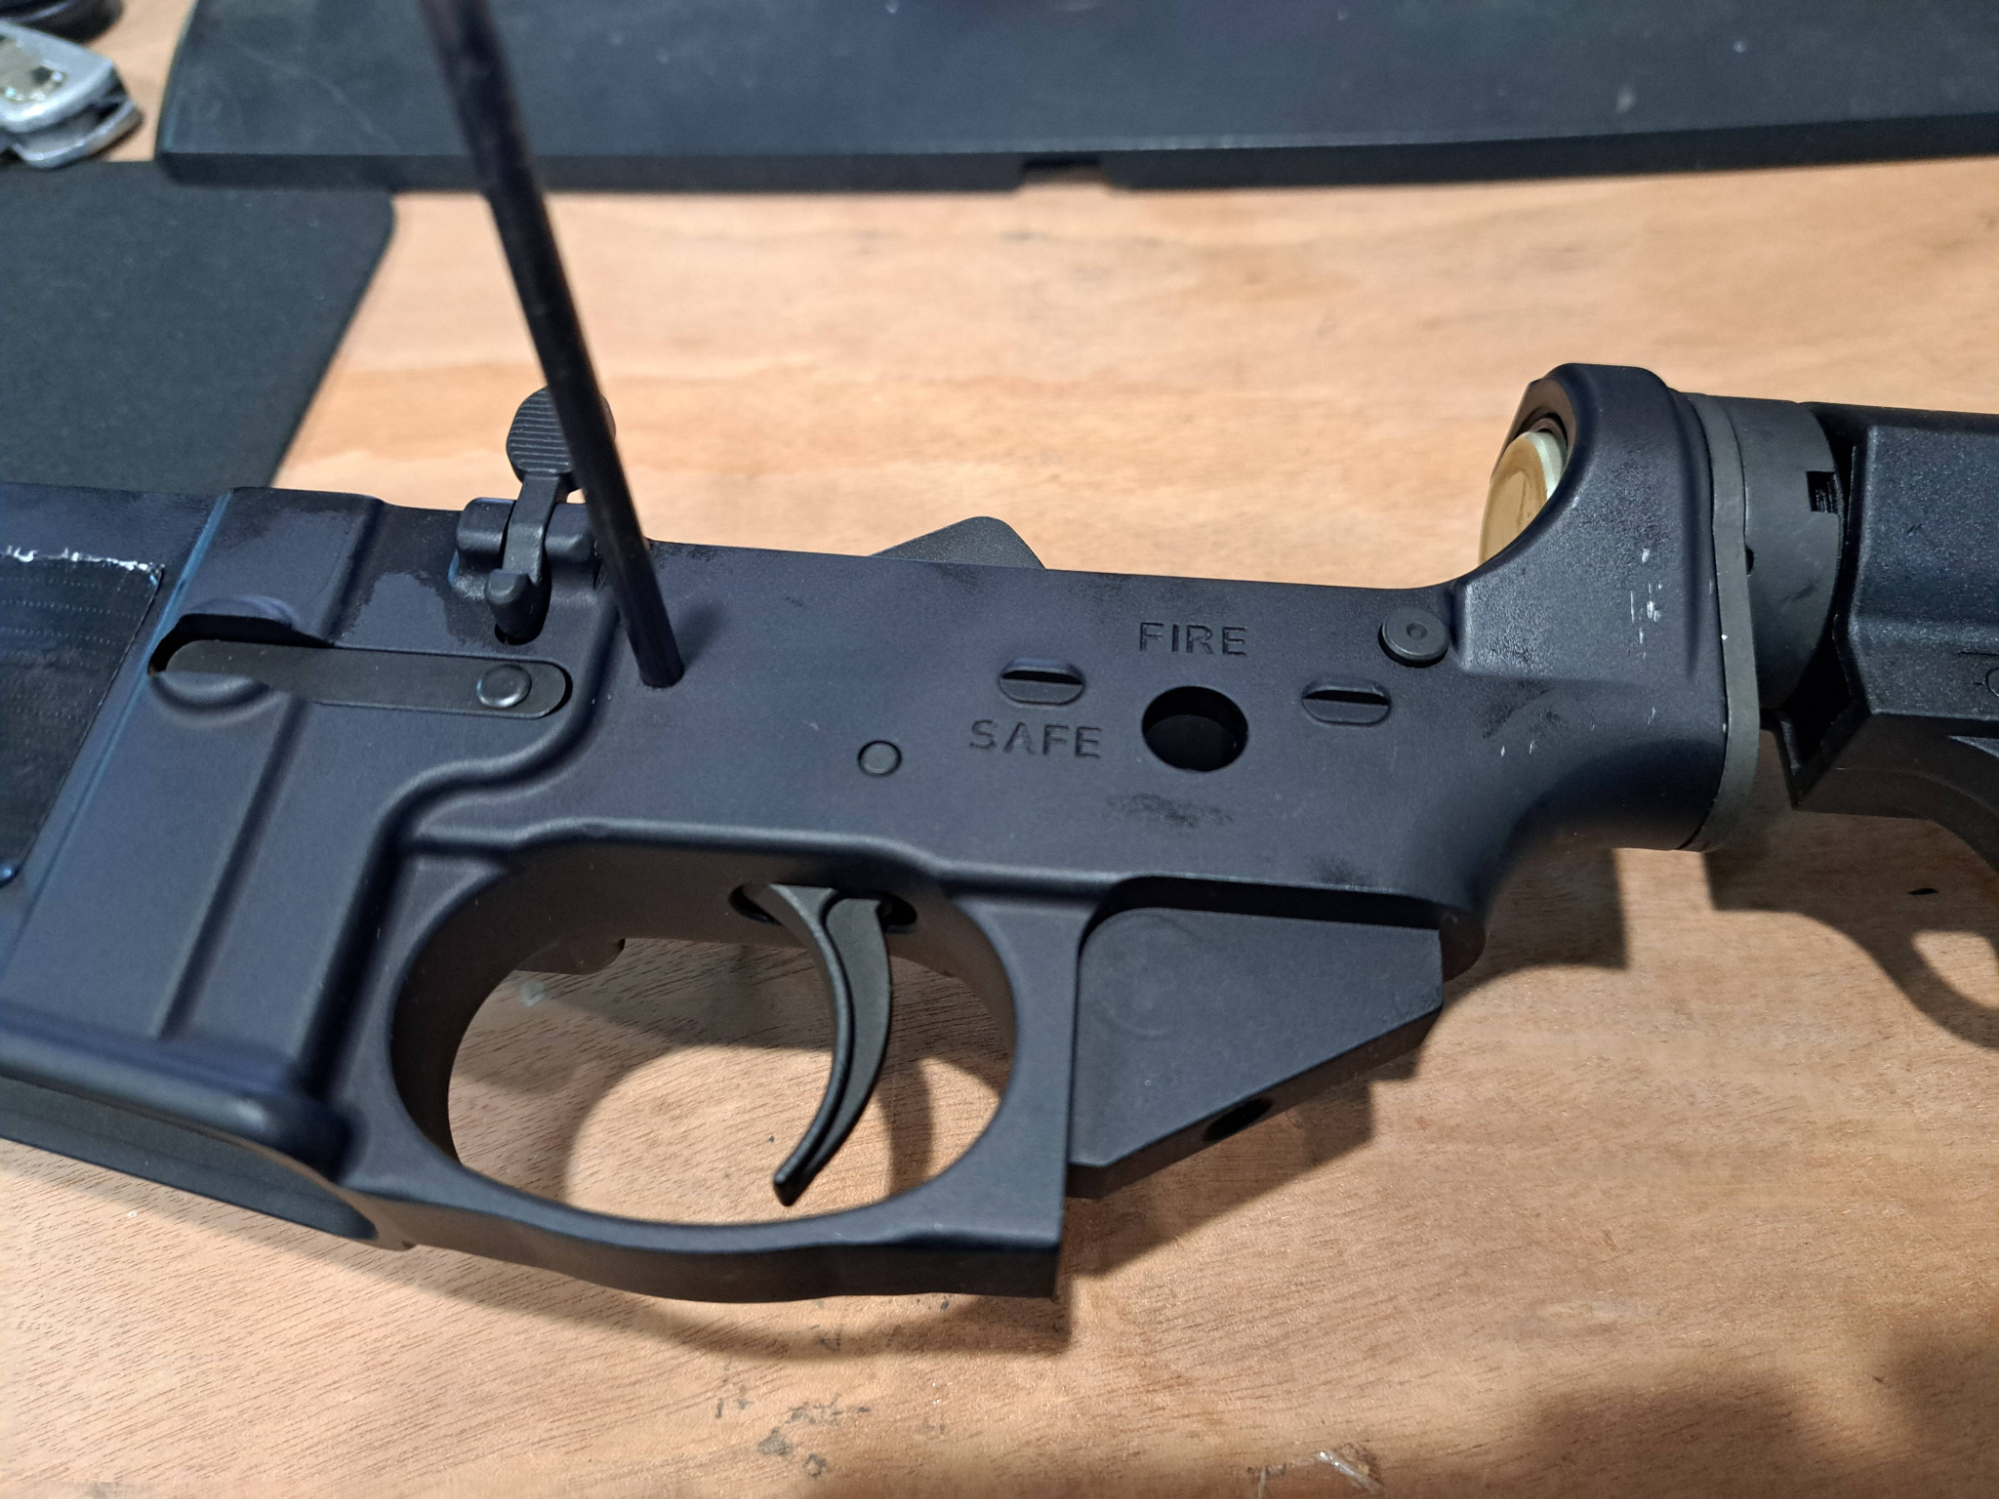
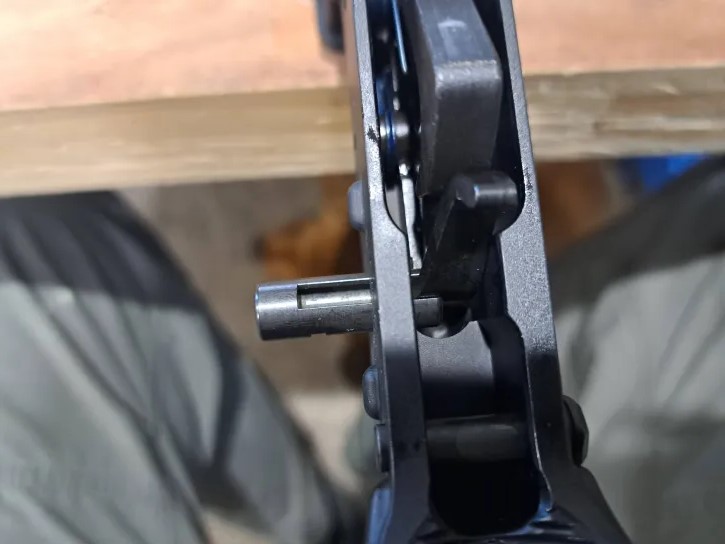
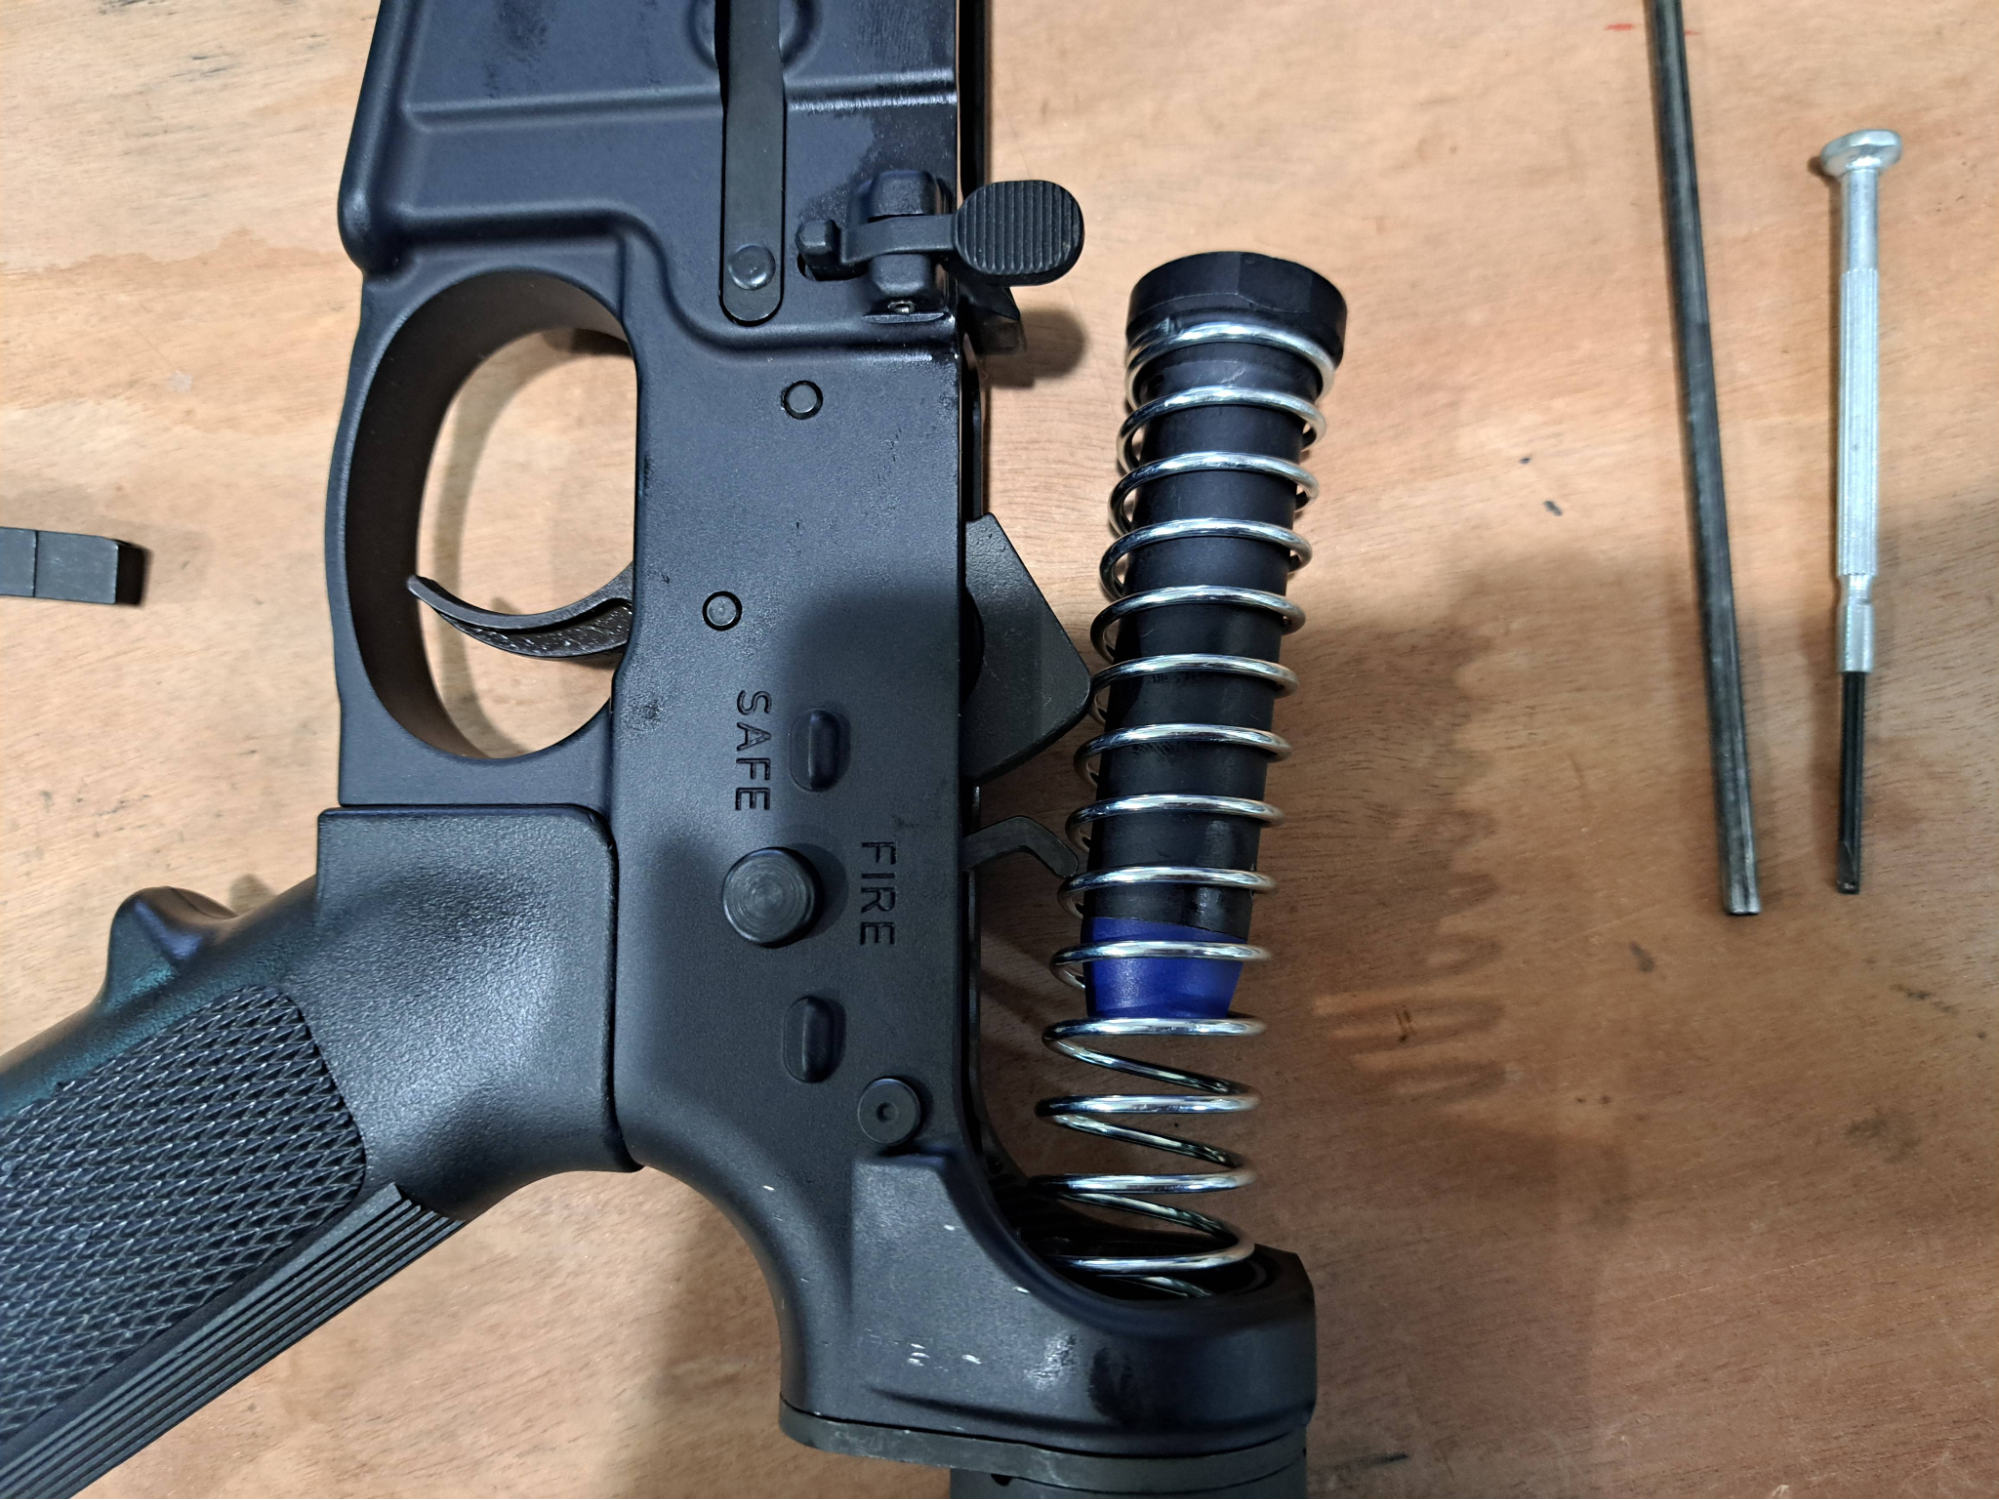
If your shelf (what stops the lever in reward travel) is too high or too far forward, the lever may not be able to rotate as far as it should, preventing the BCG from clearing the lever at all. The top of the lever should be parallel with the top of the lower receiver, as in the image below.
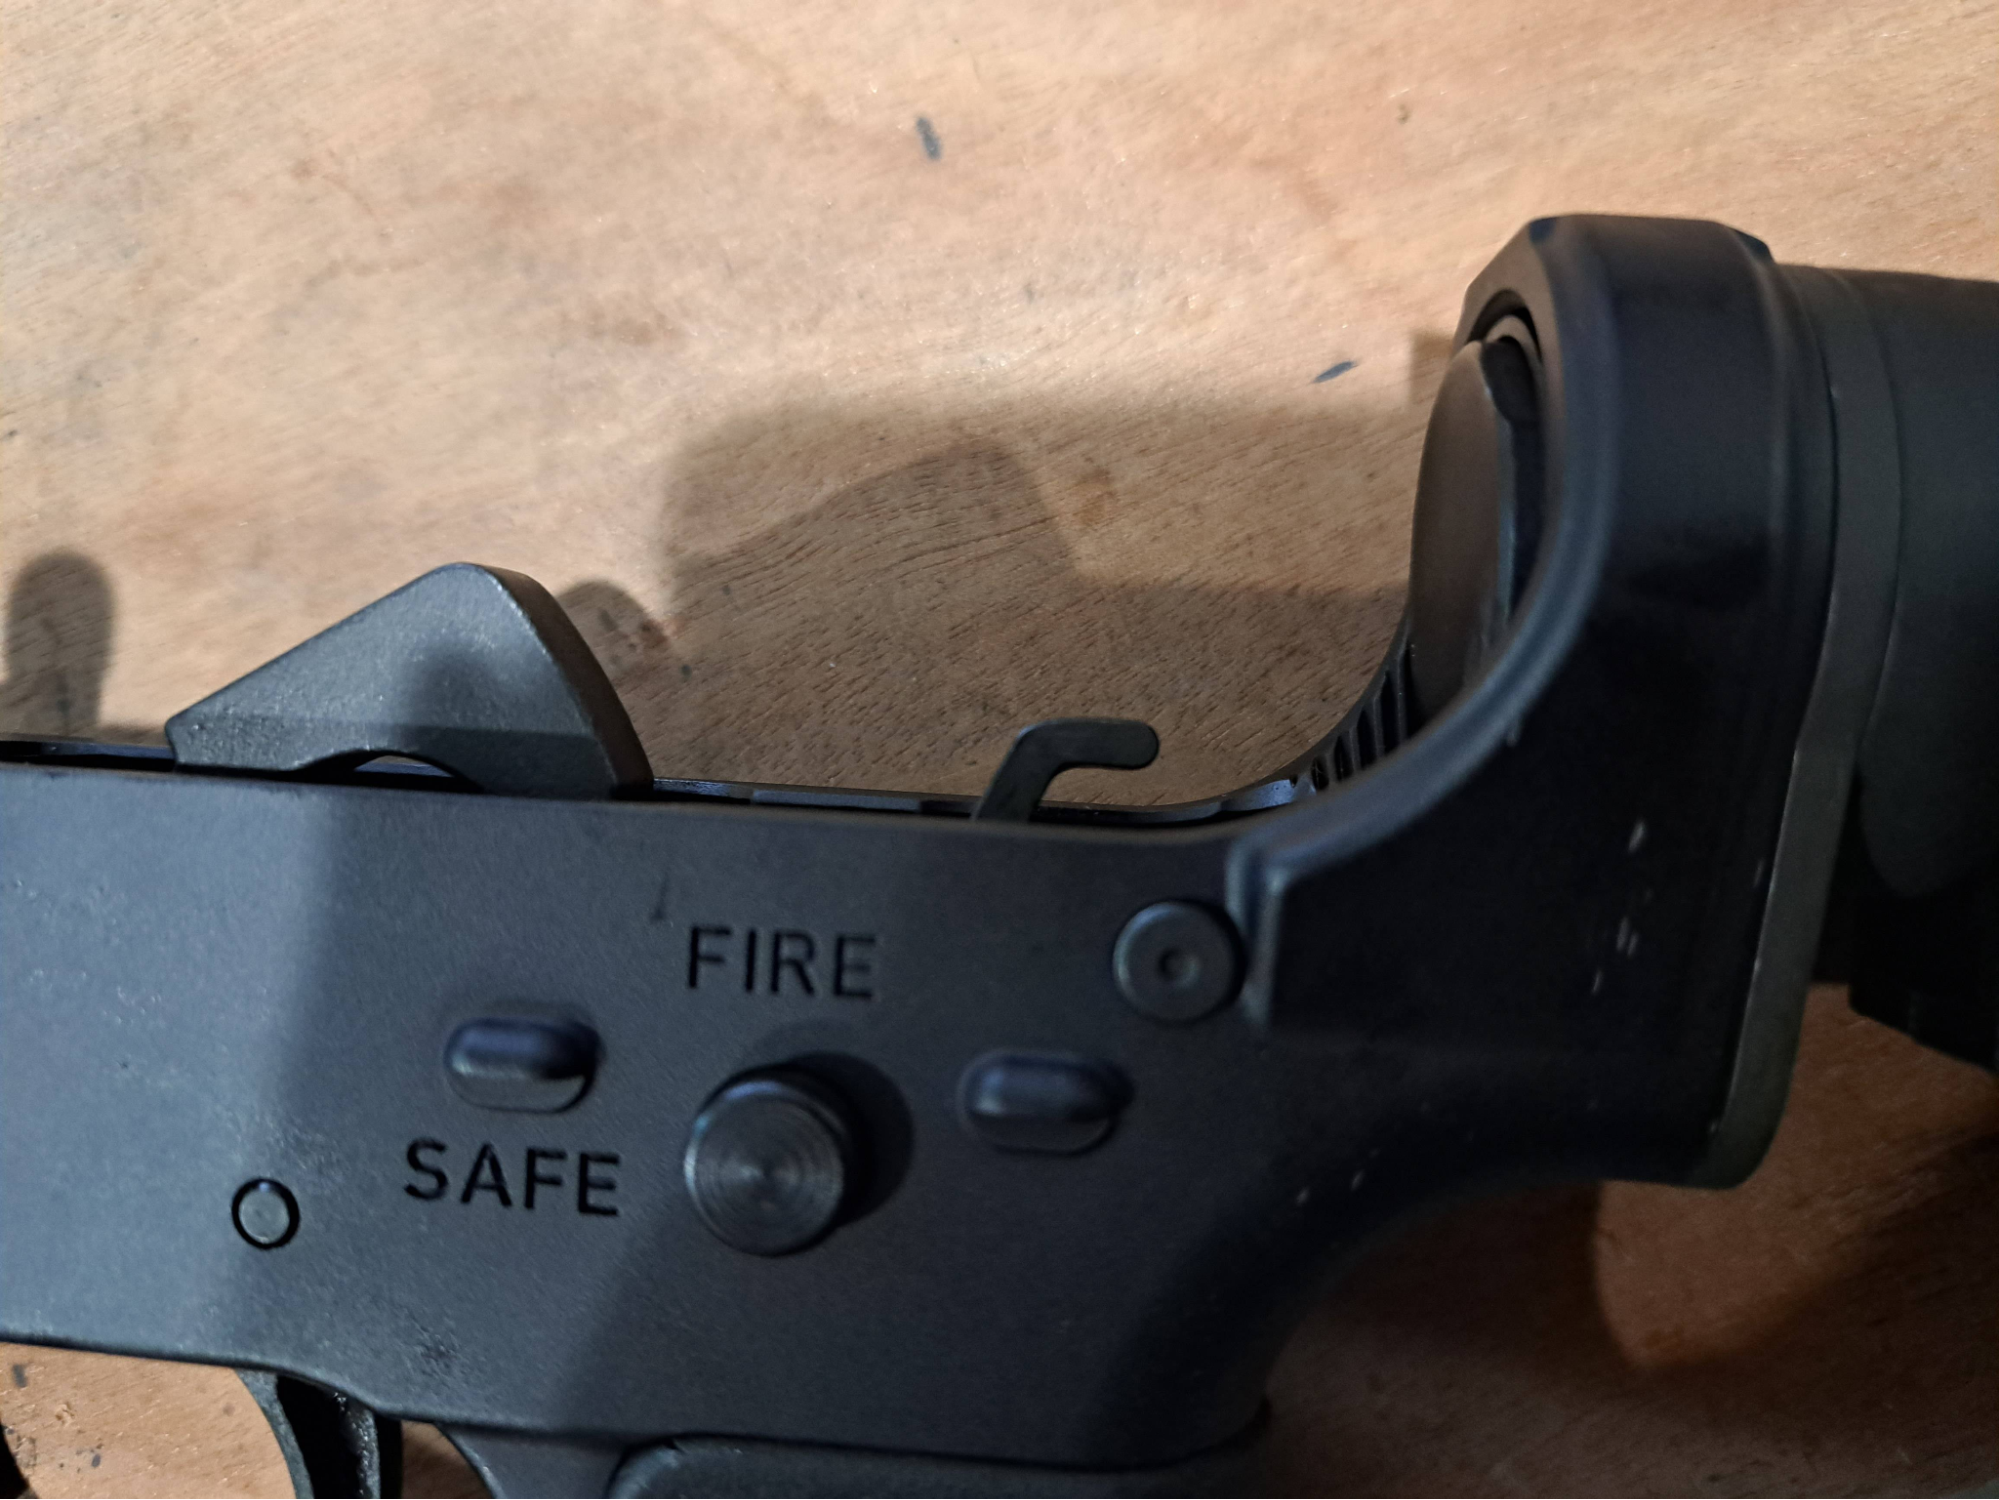
If it is *almost* there, a magazine of forced reset fire will get the lever to self-tolerance (steel is harder than aluminium). Or you can hit the lever with a hammer a bit which is essentially what the BCG will do during live fire anyway. Or you can take a needle file and chamfer the corner of the shelf where the lever hits it, or you can sand the top of the lever a little bit to give it more clearance. Don’t go too far with sanding though, there’s only 0.030” difference in height between the bottom of the BCG where the lever needs to slide under and the back of the BCG that needs to pick the lever up to rotate it forward!
Firing in bursts / light primer strikes
Your gun fires just fine and normally in semi automatic mode, but gets only one or a few rounds off before it stops in forced reset mode? You manually cycle the gun and a live round comes out with a light primer strike? Great! The super safety is working as designed! You are experiencing bolt bounce. As your bolt carrier group (BCG) travels back into battery, it bounces off your barrel. As soon as the BCG is all the way home, you pull the trigger and the hammer begins to fall. The hammer doesn’t instantly drop though, and by the time it does and it hits the firing pin, the gun is out of battery. If you open the pivot pin of your gun after a stop and the hammer is not cocked, it’s bolt bounce.
Solution: switch to a heavier buffer. H2 buffers not only slow the bolt velocity but also act like dead blow hammers, preventing bouncing. If that doesn’t fix it, then add a rifle length or AR-10 spring. If that still doesn’t fix it, you have deeper problems such as worn out gas rings or being so overgassed that you’re in danger of wearing dangerously expedited wear.
https://www.thefirearmblog.com/blog/2010/08/02/ar-15-bolt-carrier-bounce/
I fire once then I can’t and it’s stuck on safe / The lever doesn’t go back forward
I fire once then I can’t and it’s stuck on safe / The lever doesn’t go back forward
Unable to pull trigger in middle position
There are a few different likely causes:
1. The included rounded safety detent is too flattened, preventing the safety drum from rotating all the way forward. Swap to your original pointed safety detent. If it is difficult to switch between positions, trim your safety detent spring by one or two coils.
2. The back of the trigger was not entirely removed. Make sure there is nothing sticking out from the inside of the back of the left side of the trigger. Remove it, or contact the manufacturer for warranty/replacement.
Not cycling / weak ejection / not picking up round off magazine
The rounding cut of the trigger is slightly undersized. Sand a little (like 0.003”) of the rounding cut at a time until the issue is resolved. It is resetting the trigger, just at an inefficient geometry such that it takes a lot more force than it should, which is slowing down bolt velocity.
If you have further questions, send us an email!
Email UsThis is a block of text. Double-click this text to edit it.